Bookmarks in browsers are nice. You can store a place you frequently go, so you
don’t have to constantly re-google things or memorise the URL of your employer’s
internal Elasticsearch instance. This is all great, but it’s not what
bookmarks are used for in the real world.
In the real world, you have one bookmark per book/magazine/article you’re reading, and you move that bookmark to update how far along you are in
the document. Browsers should have that too, so you can store how far you’ve
gotten in long blog posts or online books (like this one or
that or
Worm).
The existing solutions for those cases are kind of bad:
You can just leave the tab open and get back to it later. But this is prone
to all sorts of accidents. If you resize your browser window, that might mess
up your scroll position; if you close the tab or restart your browser, that
might mess up your scroll position. And even if your browser syncs your open
tabs across devices, it probably won’t sync your scroll position.
If you’re reading an online book where each (short) chapter is one page, you
could use regular browser bookmarks to save your reading position. But that
means you either need to delete your old reading-position bookmark every time
you create a new one, or add a date/time to the bookmark name, like “Reading
position 2025-03-29”.1 But this still doesn’t help if you want to read a
20,000-word LessWrong post in more than one sitting.
You can use a more sophisticated bookmark manager (I use
Raindrop), and place a highlight on the last bit of
text that you read, maybe with a special colour to indicate that this is a
reading-progress marker rather than an actual highlight of the content. This
syncs between devices and works for long documents, but you still need to
tidy up after yourself.
What I’d like is to have a special type of bookmark (call it “Place marker” or
something) that I can put in a specific place on a page, and the next time I
place a marker with the same name, it deletes the old marker. (Basically, what
we have now is the equivalent of tags in Git, and I want the equivalent of
branches in Git (which, incidentally, is what Mercurial calls
“bookmarks”, I think?)). This would
be a perfect feature to build into something like
Raindrop so it can sync between devices.
Footnotes
Gosh, it’s been a while since I started this post. ↩
I strongly believe there are entire companies right now under heavy AI psychosis and its impossible to have rational conversations about it with them. I can’t name any specific people because they include personal friends I deeply respect, but I worry about how this plays out.
[…]
It’s frightening, because the psychosis folks operate under an almost absolute “MTTR is all you need” mentality: “its fine to ship bugs because the agents will fix them so quickly and at a scale humans can’t do!” We learned in infrastructure that MTTR is great but you can’t yeet resilient systems entirely.
I sympathise with the worry that tech people are getting overly excited about moving fast and breaking things with LLMs. But that’s not psychosis! Even calling it AI-induced mania would be overselling it. You just disagree with people’s cost-benefit analyses. A human psychiatrist I know in real life suggested you could call it AI hypomania, if you really insist on using a medical term.
This dilution of the meaning of “psychosis” bothers me because it makes it harder to talk about actual psychosis caused or made worse by AI. Psychosis is a real thing with an actual definition, and that definition is not “does stuff that I think is daft”.
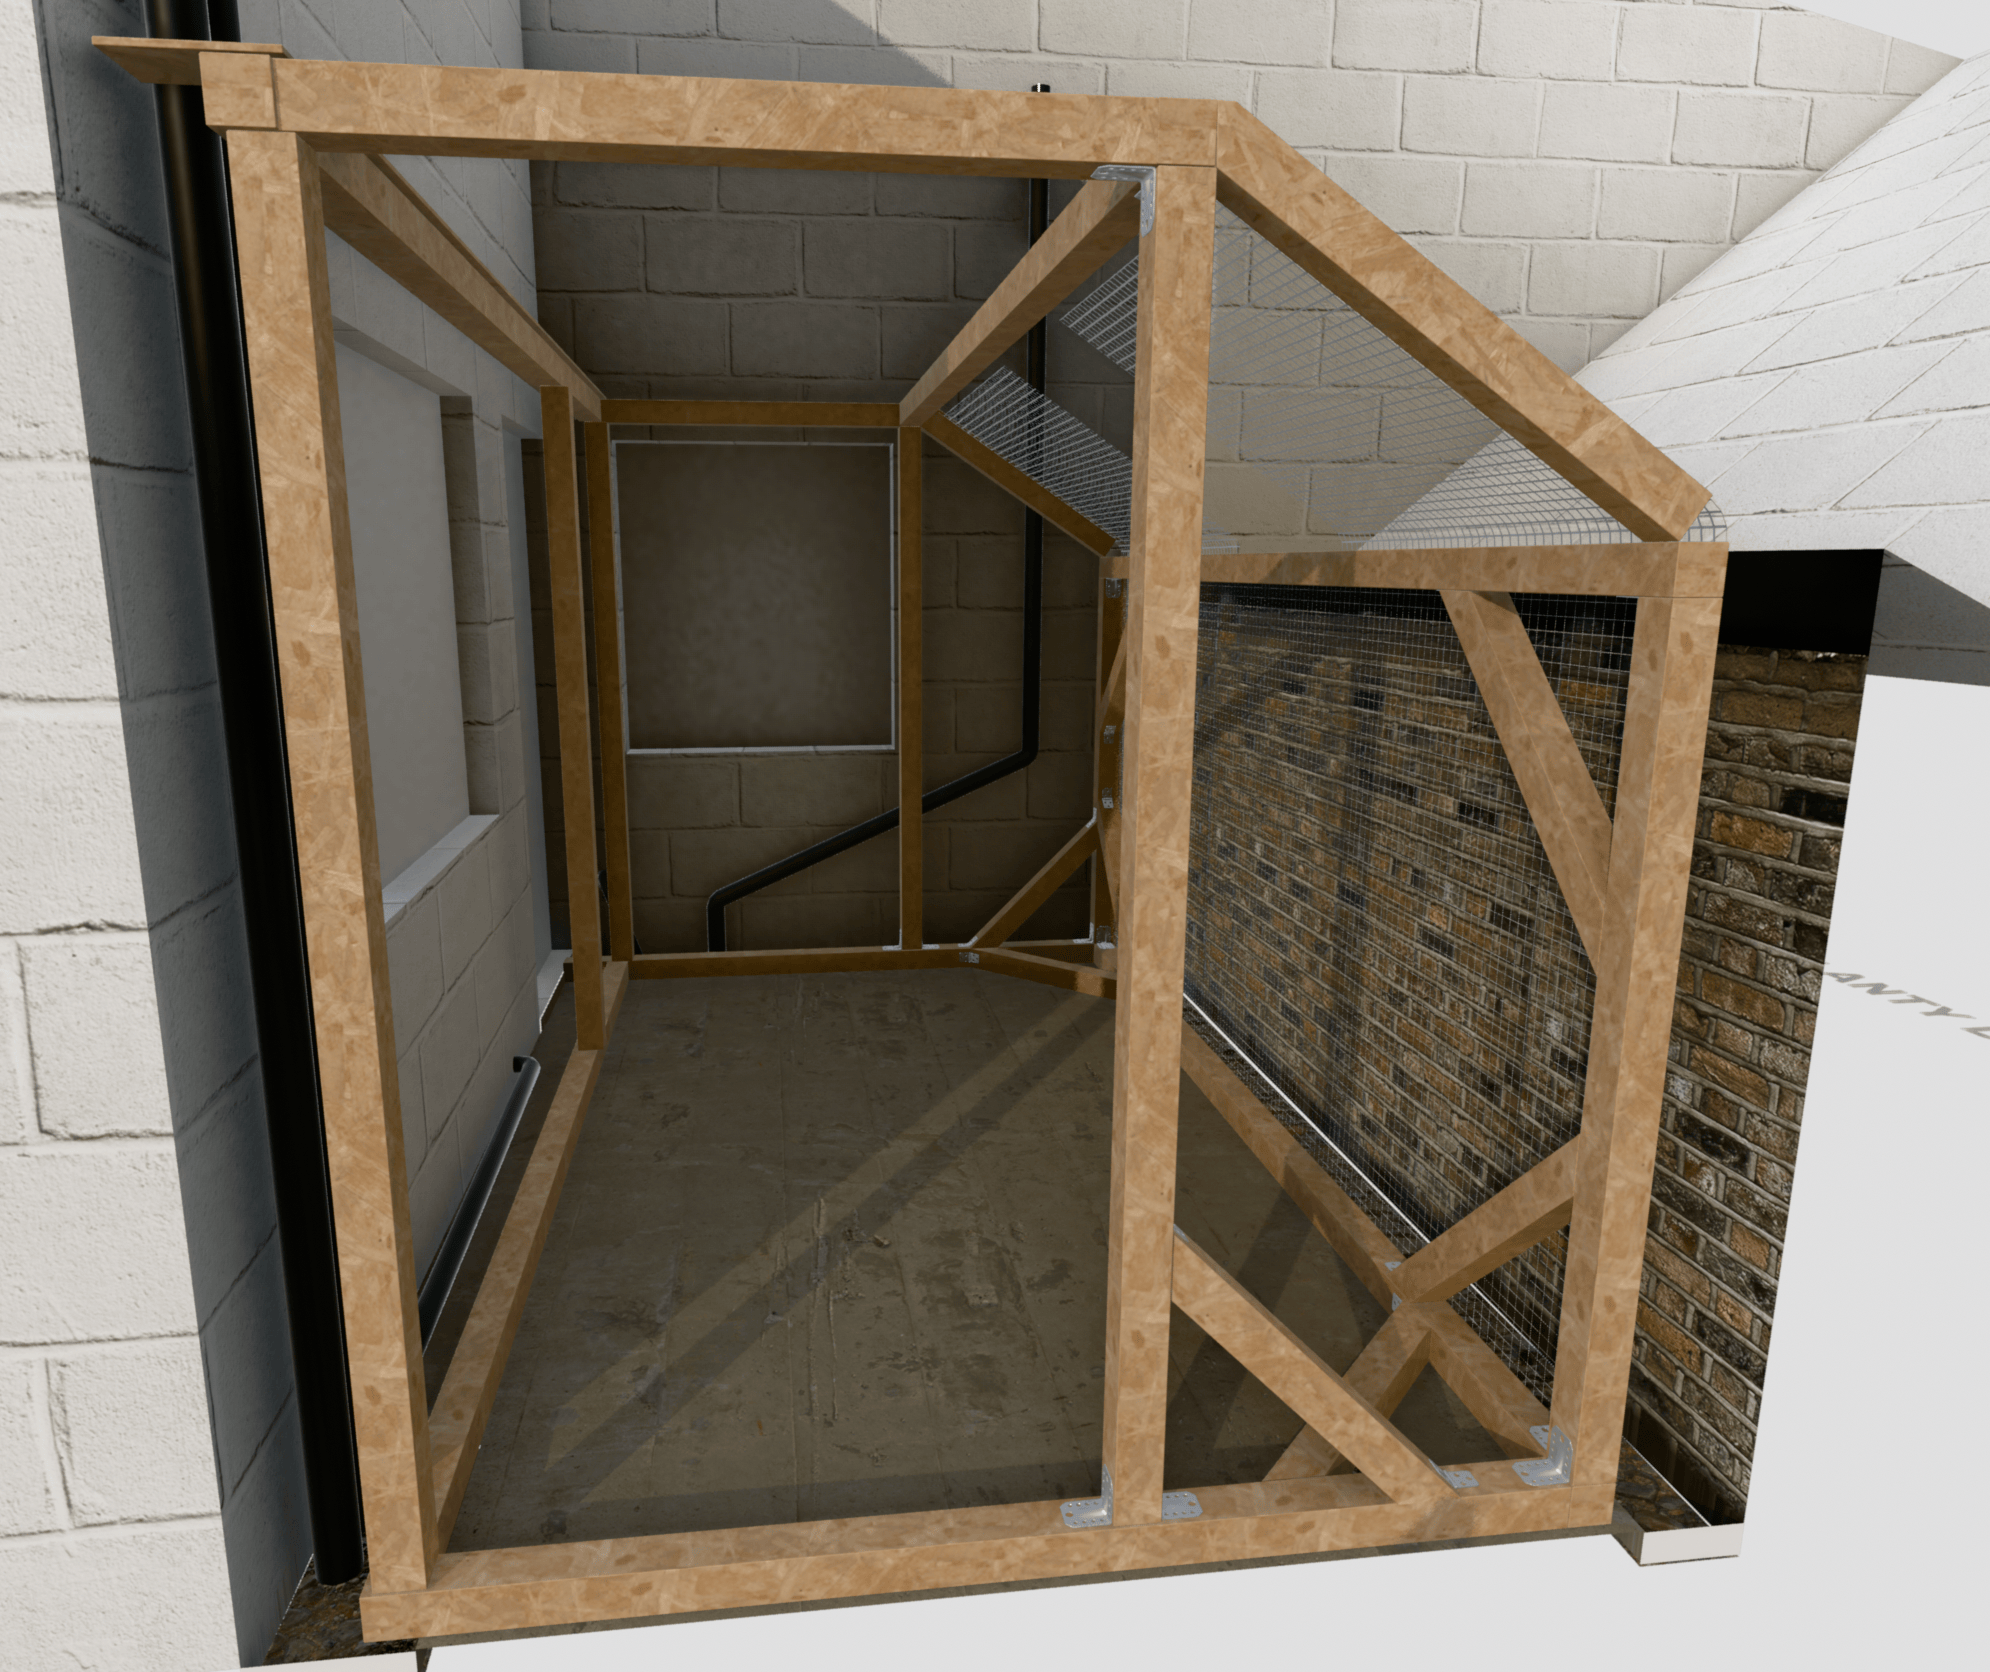
After many months of interruption, we have finally finished the catio. Recall
that, last time, we left off at a rough sketch of
a plan:
And all that was left was getting the materials and actually building the whole
thing.
Neither Katherine nor I had ever really done anything remotely like this project
before, and it was pretty scary for our first time ordering wood online to be
this pricey. We ended up buying about 50m of wooden beams, plus several
square-metres of thinner wooden sheets. The wood cost us about £500, and we
spent another £300 on random other stuff – tools, hinges, the mesh, screws,
etc.
Click on any picture to enlarge.
The wood arrives
It doesn’t look so bad lying on the street outside the house, but it was a real
pain to get it in: The pieces were about 4–5m each, far too long to fit around
all the corners needed to get them through the door, so we had to push them in
through the front window and be really careful not to smash the glass in the
process. Since we were only two people we had to push each piece in partway,
with one person on the inside of the house and one on the outside, then rest it
on the bottom window pane while the outside person rushes in, and manoeuvre it
the rest of the way with both of us indoors.
Jinx was very confused about all this new stuff in the flat:
(I don’t think I have any pictures of the big sheets of thin wood in the flat.)
And with all some of the materials gathered, it was time to
start the construction.
The general approach was:
Cut up the wood into beams of the right lengths (which means we needed to
figure out exactly how everything would fit together.)
Varnish all the wood so it’ll be protected from the weather.
Assemble each wall separately, adding mesh as needed.
Put it all together.
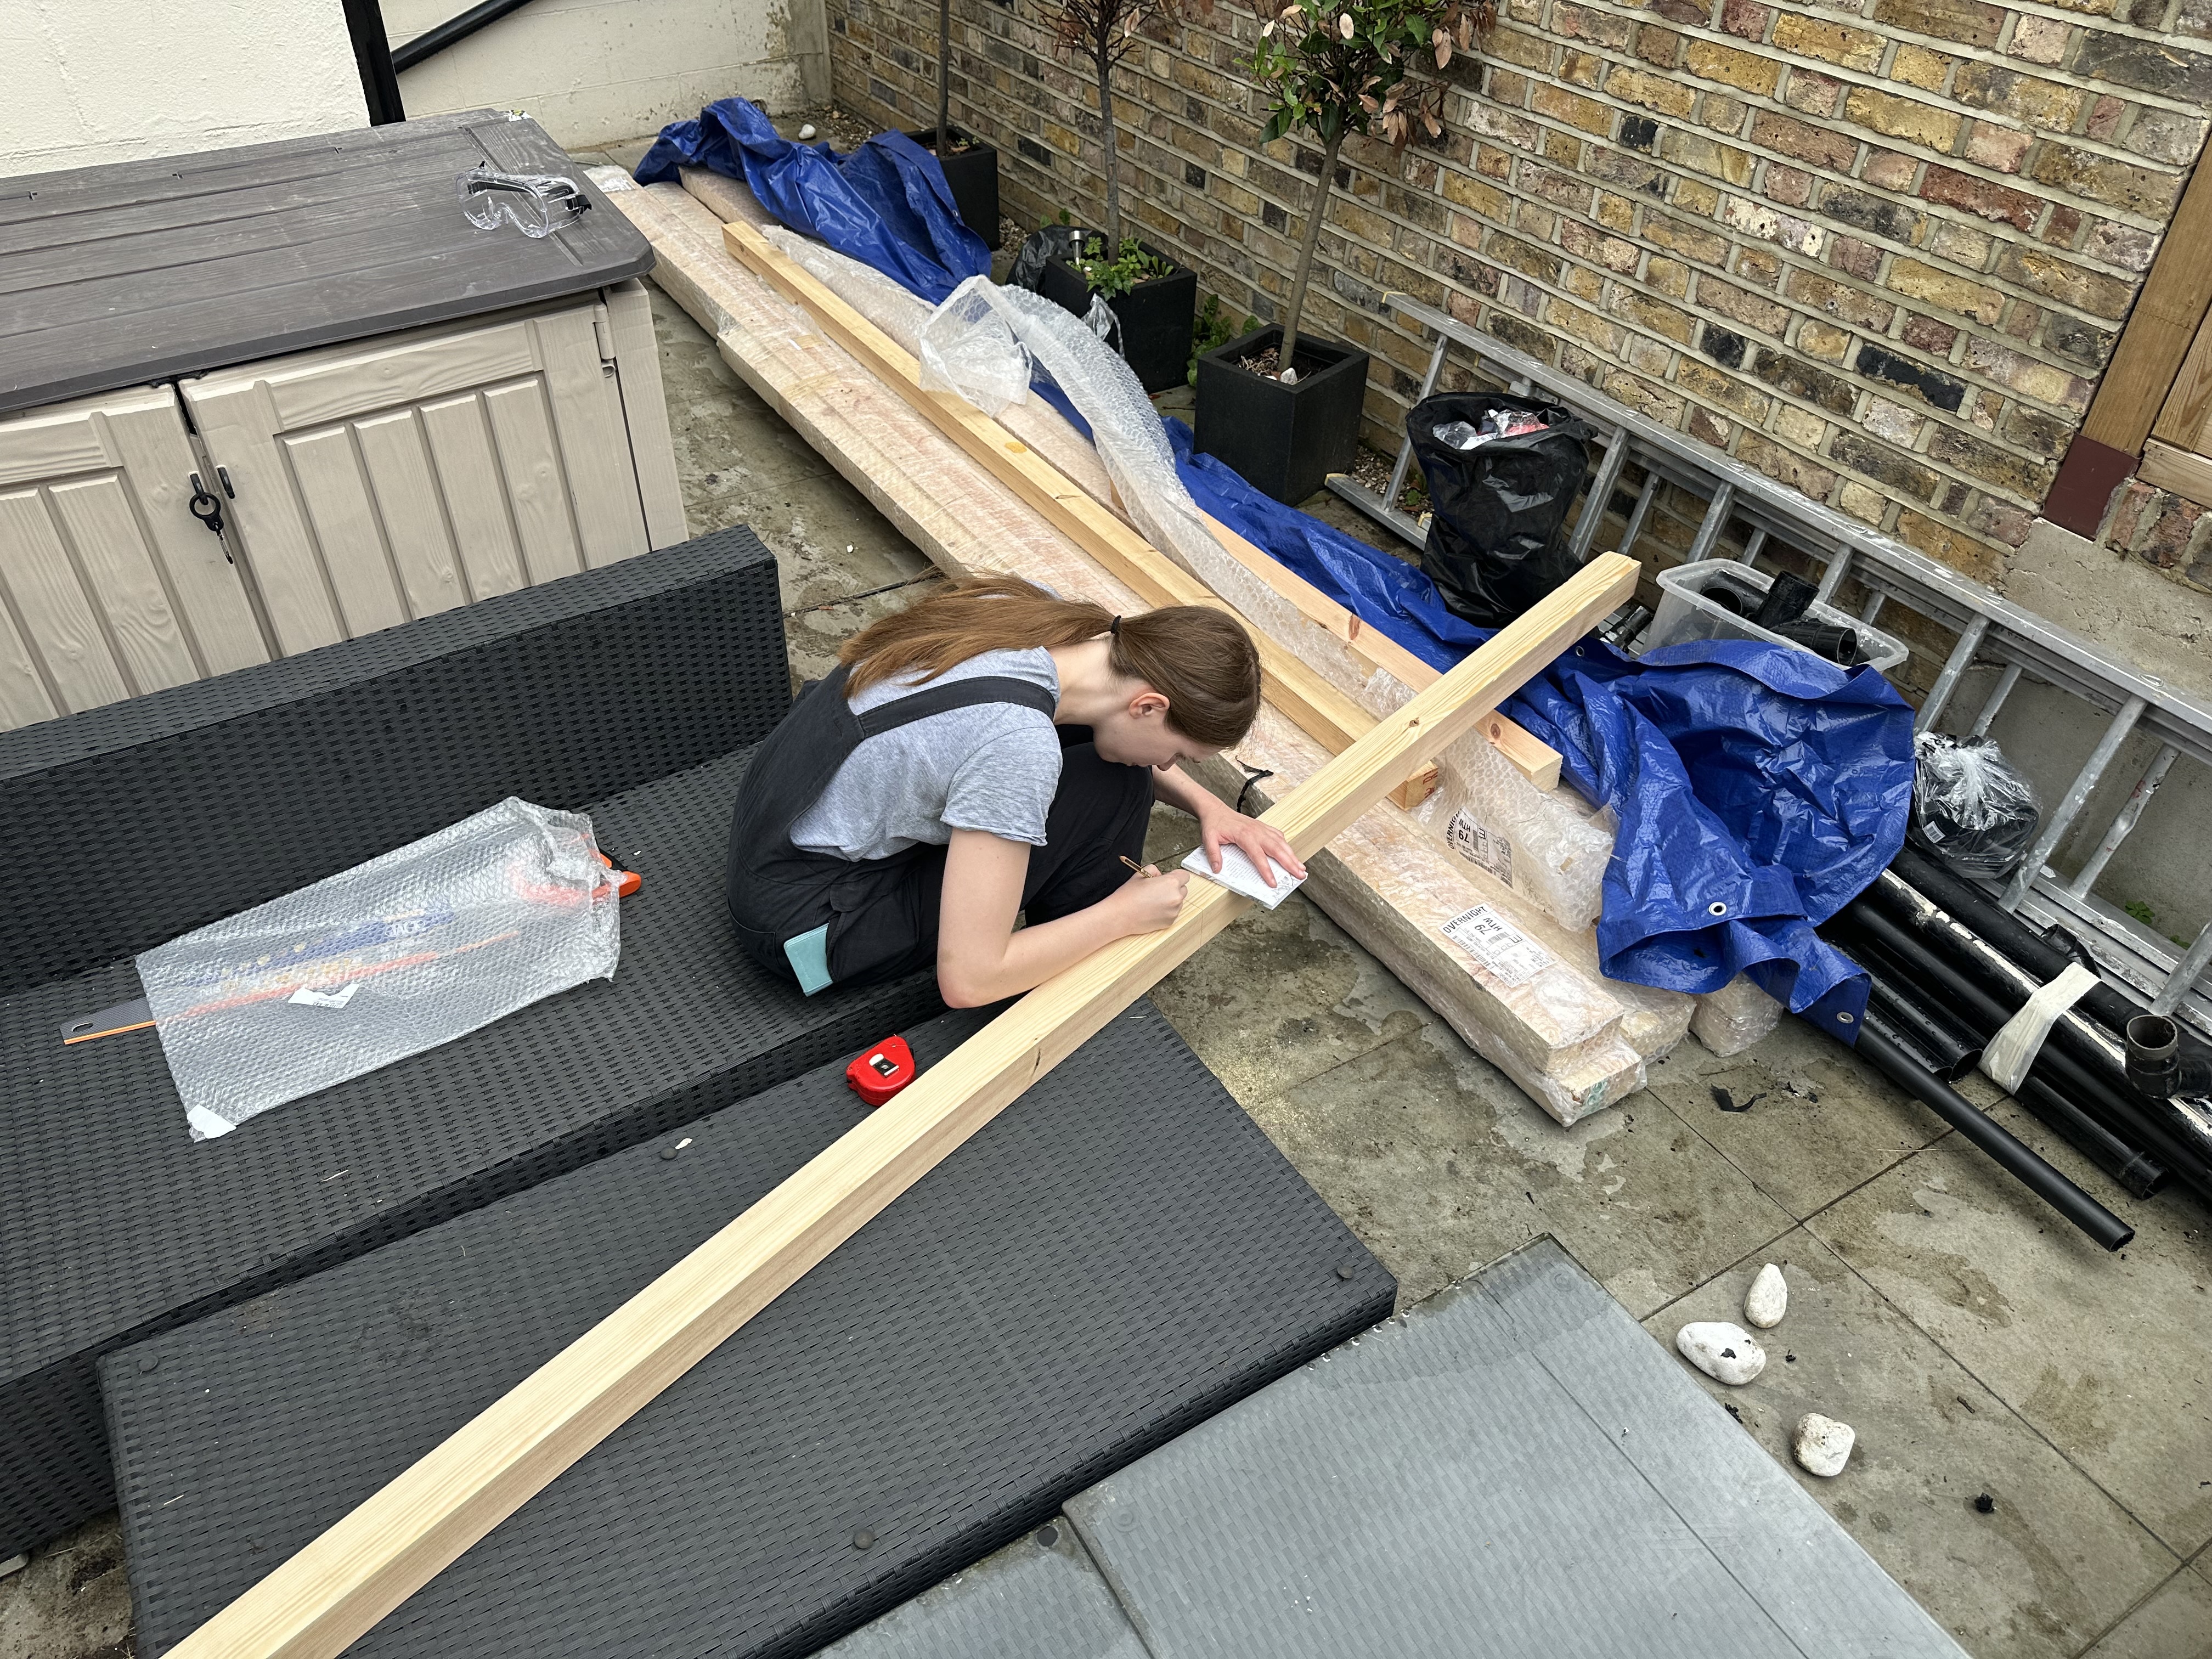
Step 1: Cutting stuff up and yet more planning (ugh)
Here, Katherine is doing some measurements:
And I’m doing some very professional-looking sawing:
Though that was quickly interrupted when I scraped my leg with the saw:
Katherine does sawing too:
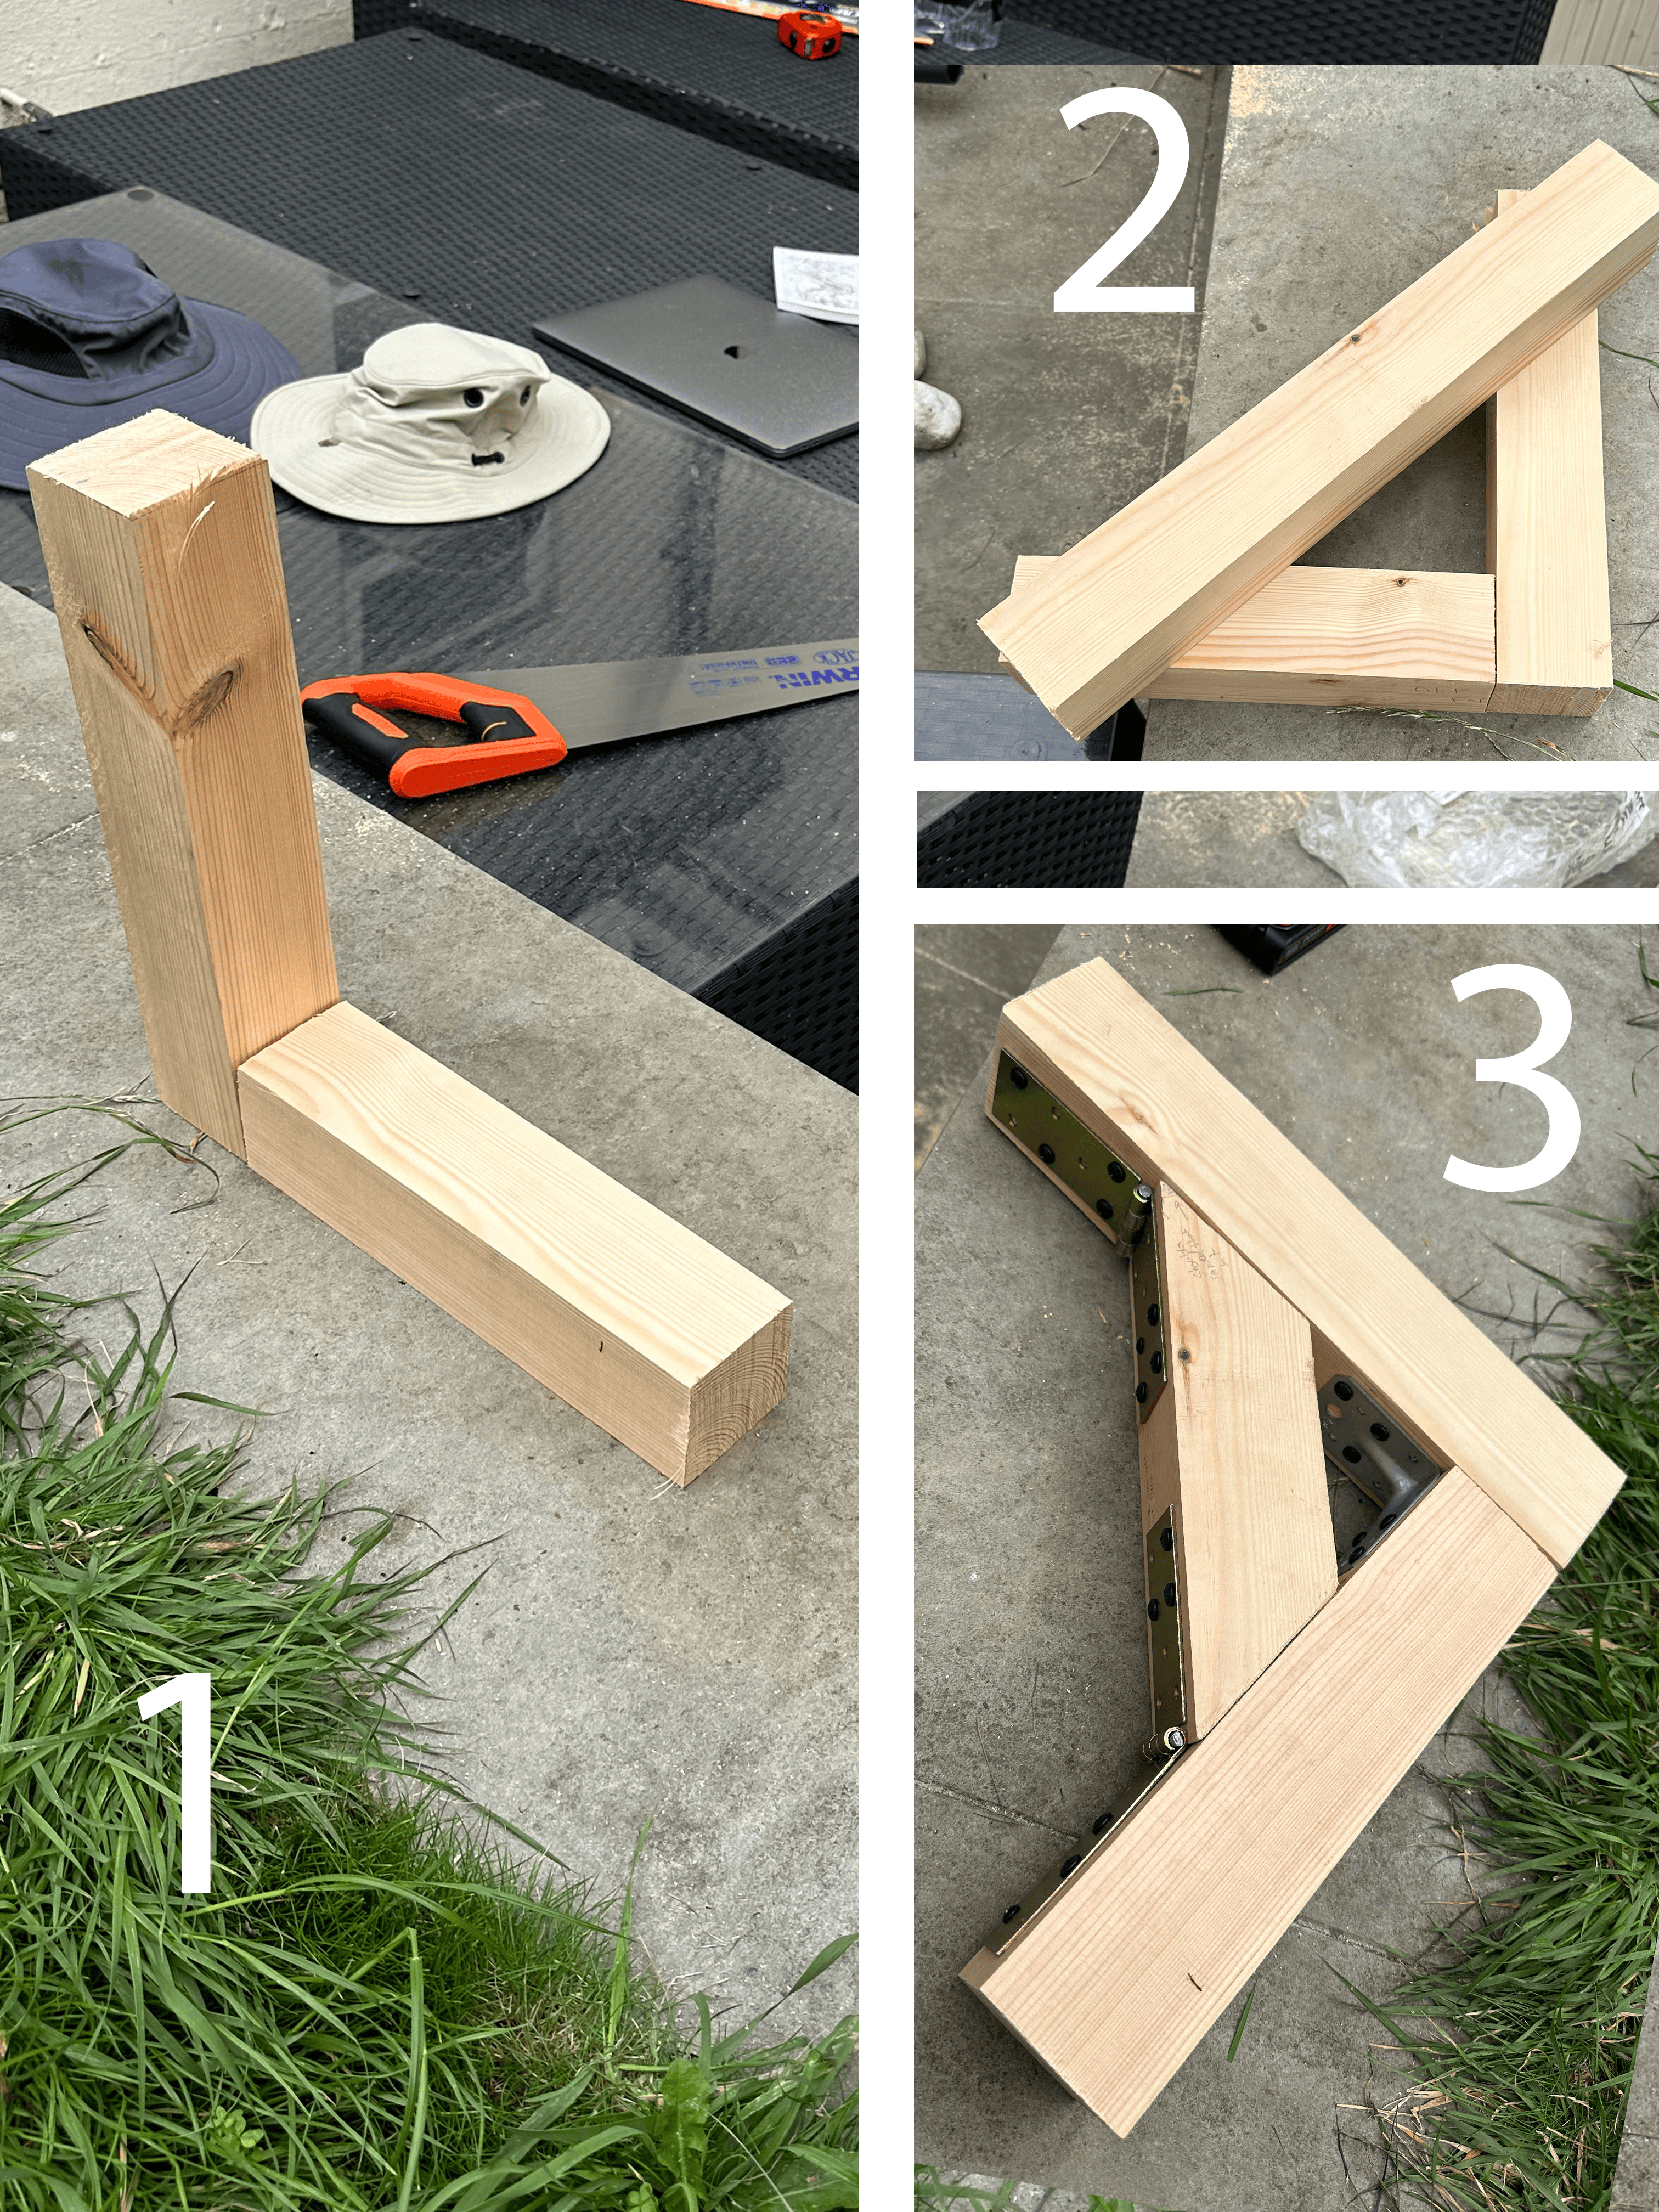
Step 1.5: Practice time!
Step 1.5: Time for a little diversion! We wanted to practice putting things
together on a smaller scale, to see if it would even work at all. So we used
some of the surplus from the big beams to make a little practice corner out of
two pieces, connected with a 90° bracket, and reinforced with a diagonal bit
held in place by hinges:
It actually turned out a lot sturdier than I had expected.
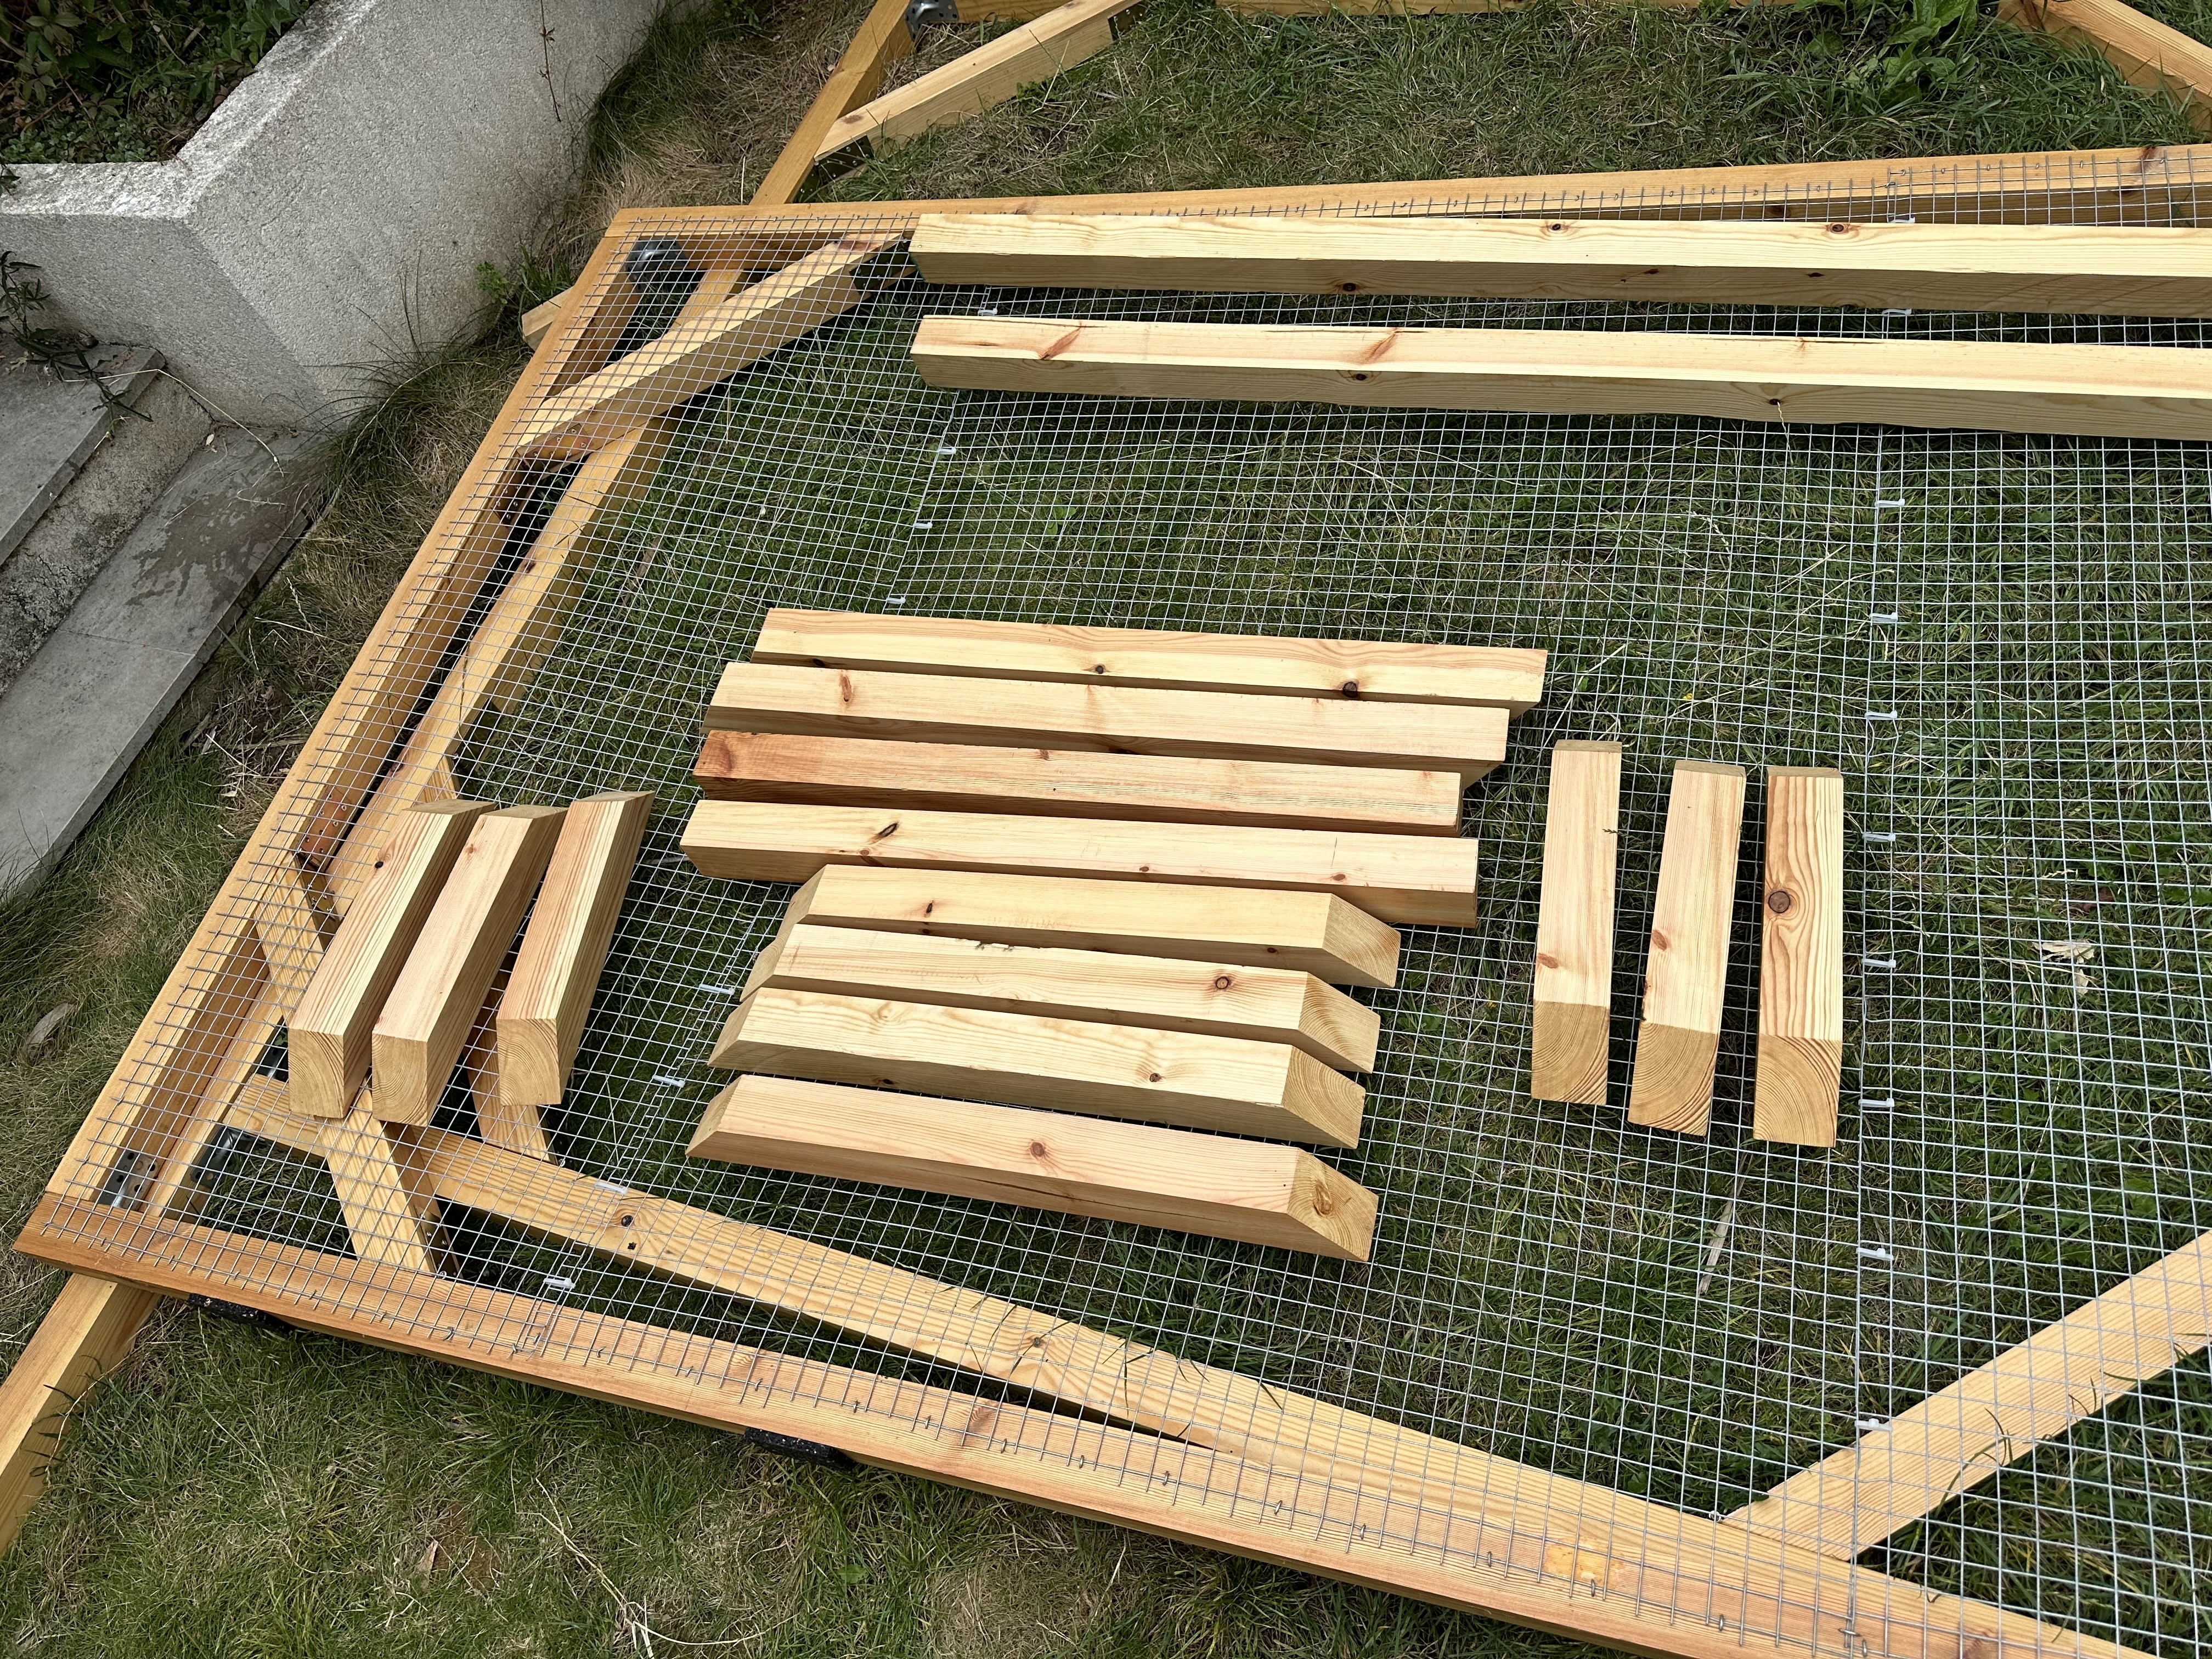
Steps 2 & 3: It’s varnish o’clock
Happy with the outcome of the practice corner, it was time to take all the
cut-up wood, lay them out in the garden, and varnish them, so we didn’t have to
be as careful about covering them with a tarp every night. In England, it
sometimes rains. Who knew. See how pale they are in this picture:
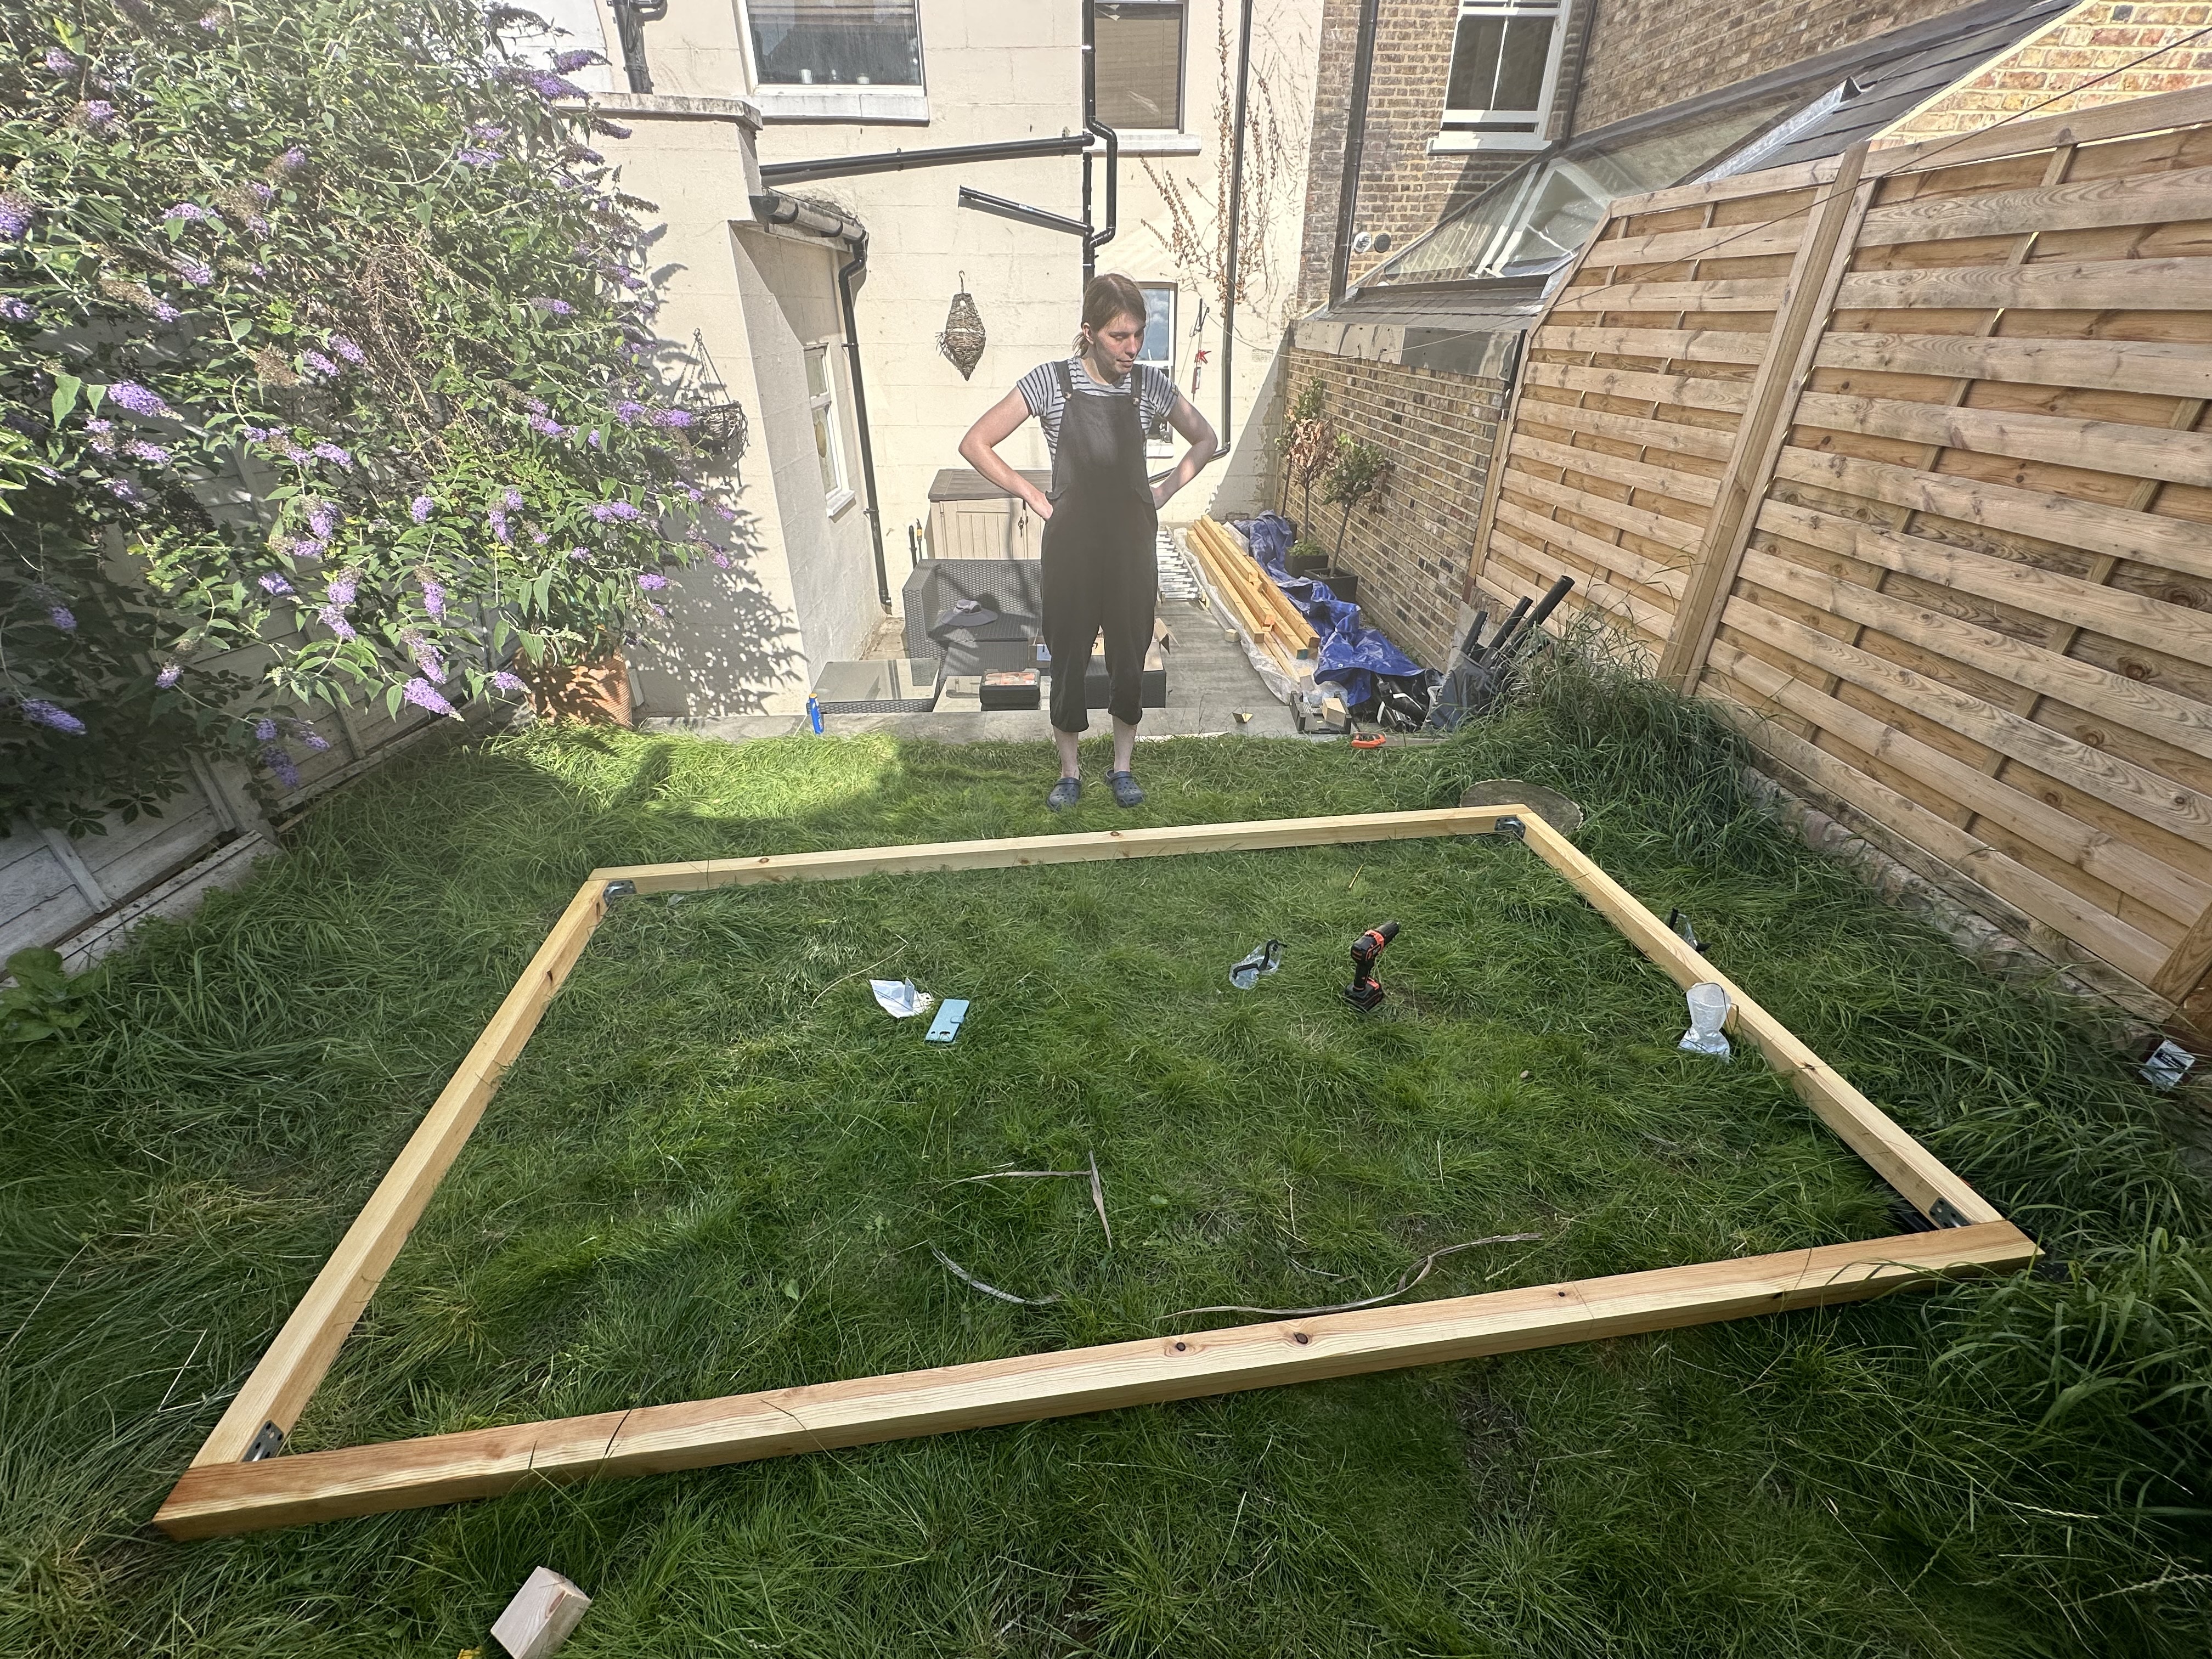
Once all the big bits were varnished, we started putting together the frames for
the walls. Here’s our first rectangle:
Here you can see the effect of the oil coating a little better; the rectangles
are kind of a nice golden colour:
We added some diagonal bits to stabilise the whole structure:
After the first wall was done, we put it aside, so (1) we could marvel at its
beauty in the context of where it would one day be assembled, and (2) so we’d
have space on the grass to assemble the next wall.
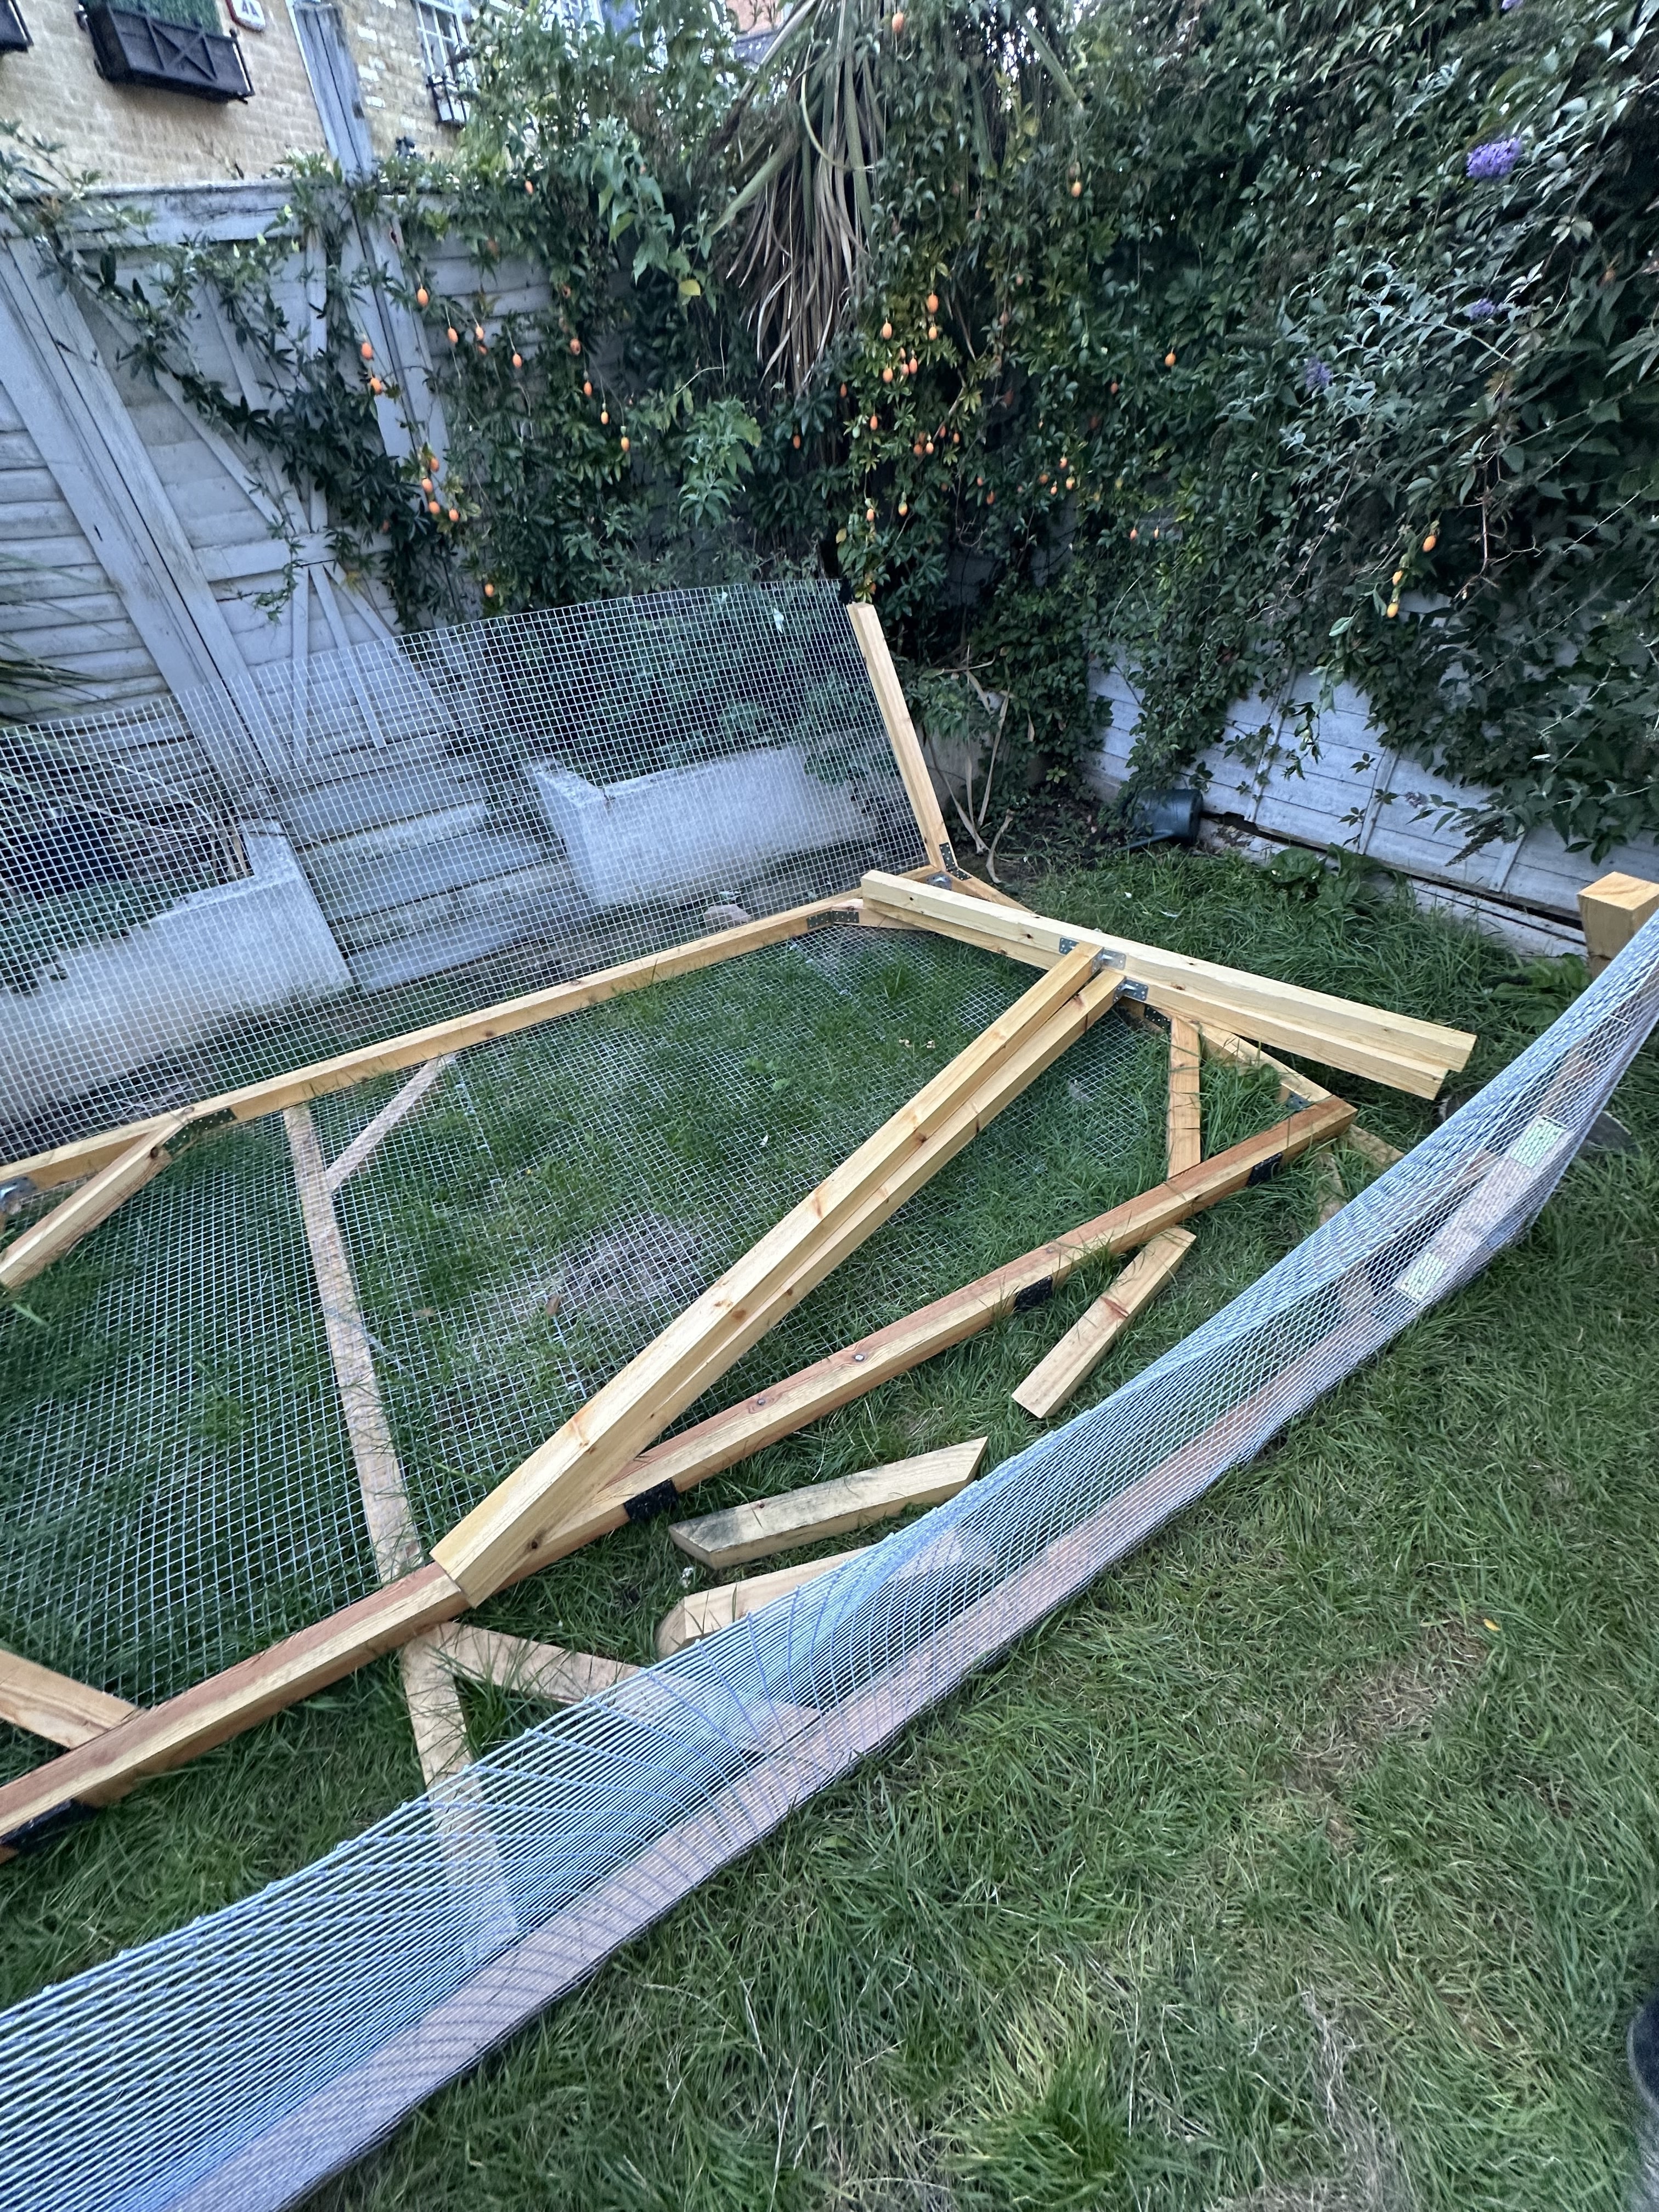
Here’s the next wall. This one won’t be flush to a building wall, so we need
mesh to cover it.
I think this is the point at which we’re delayed for months and months due to
bad weather, so suddenly we go from summer to the middle of winter:
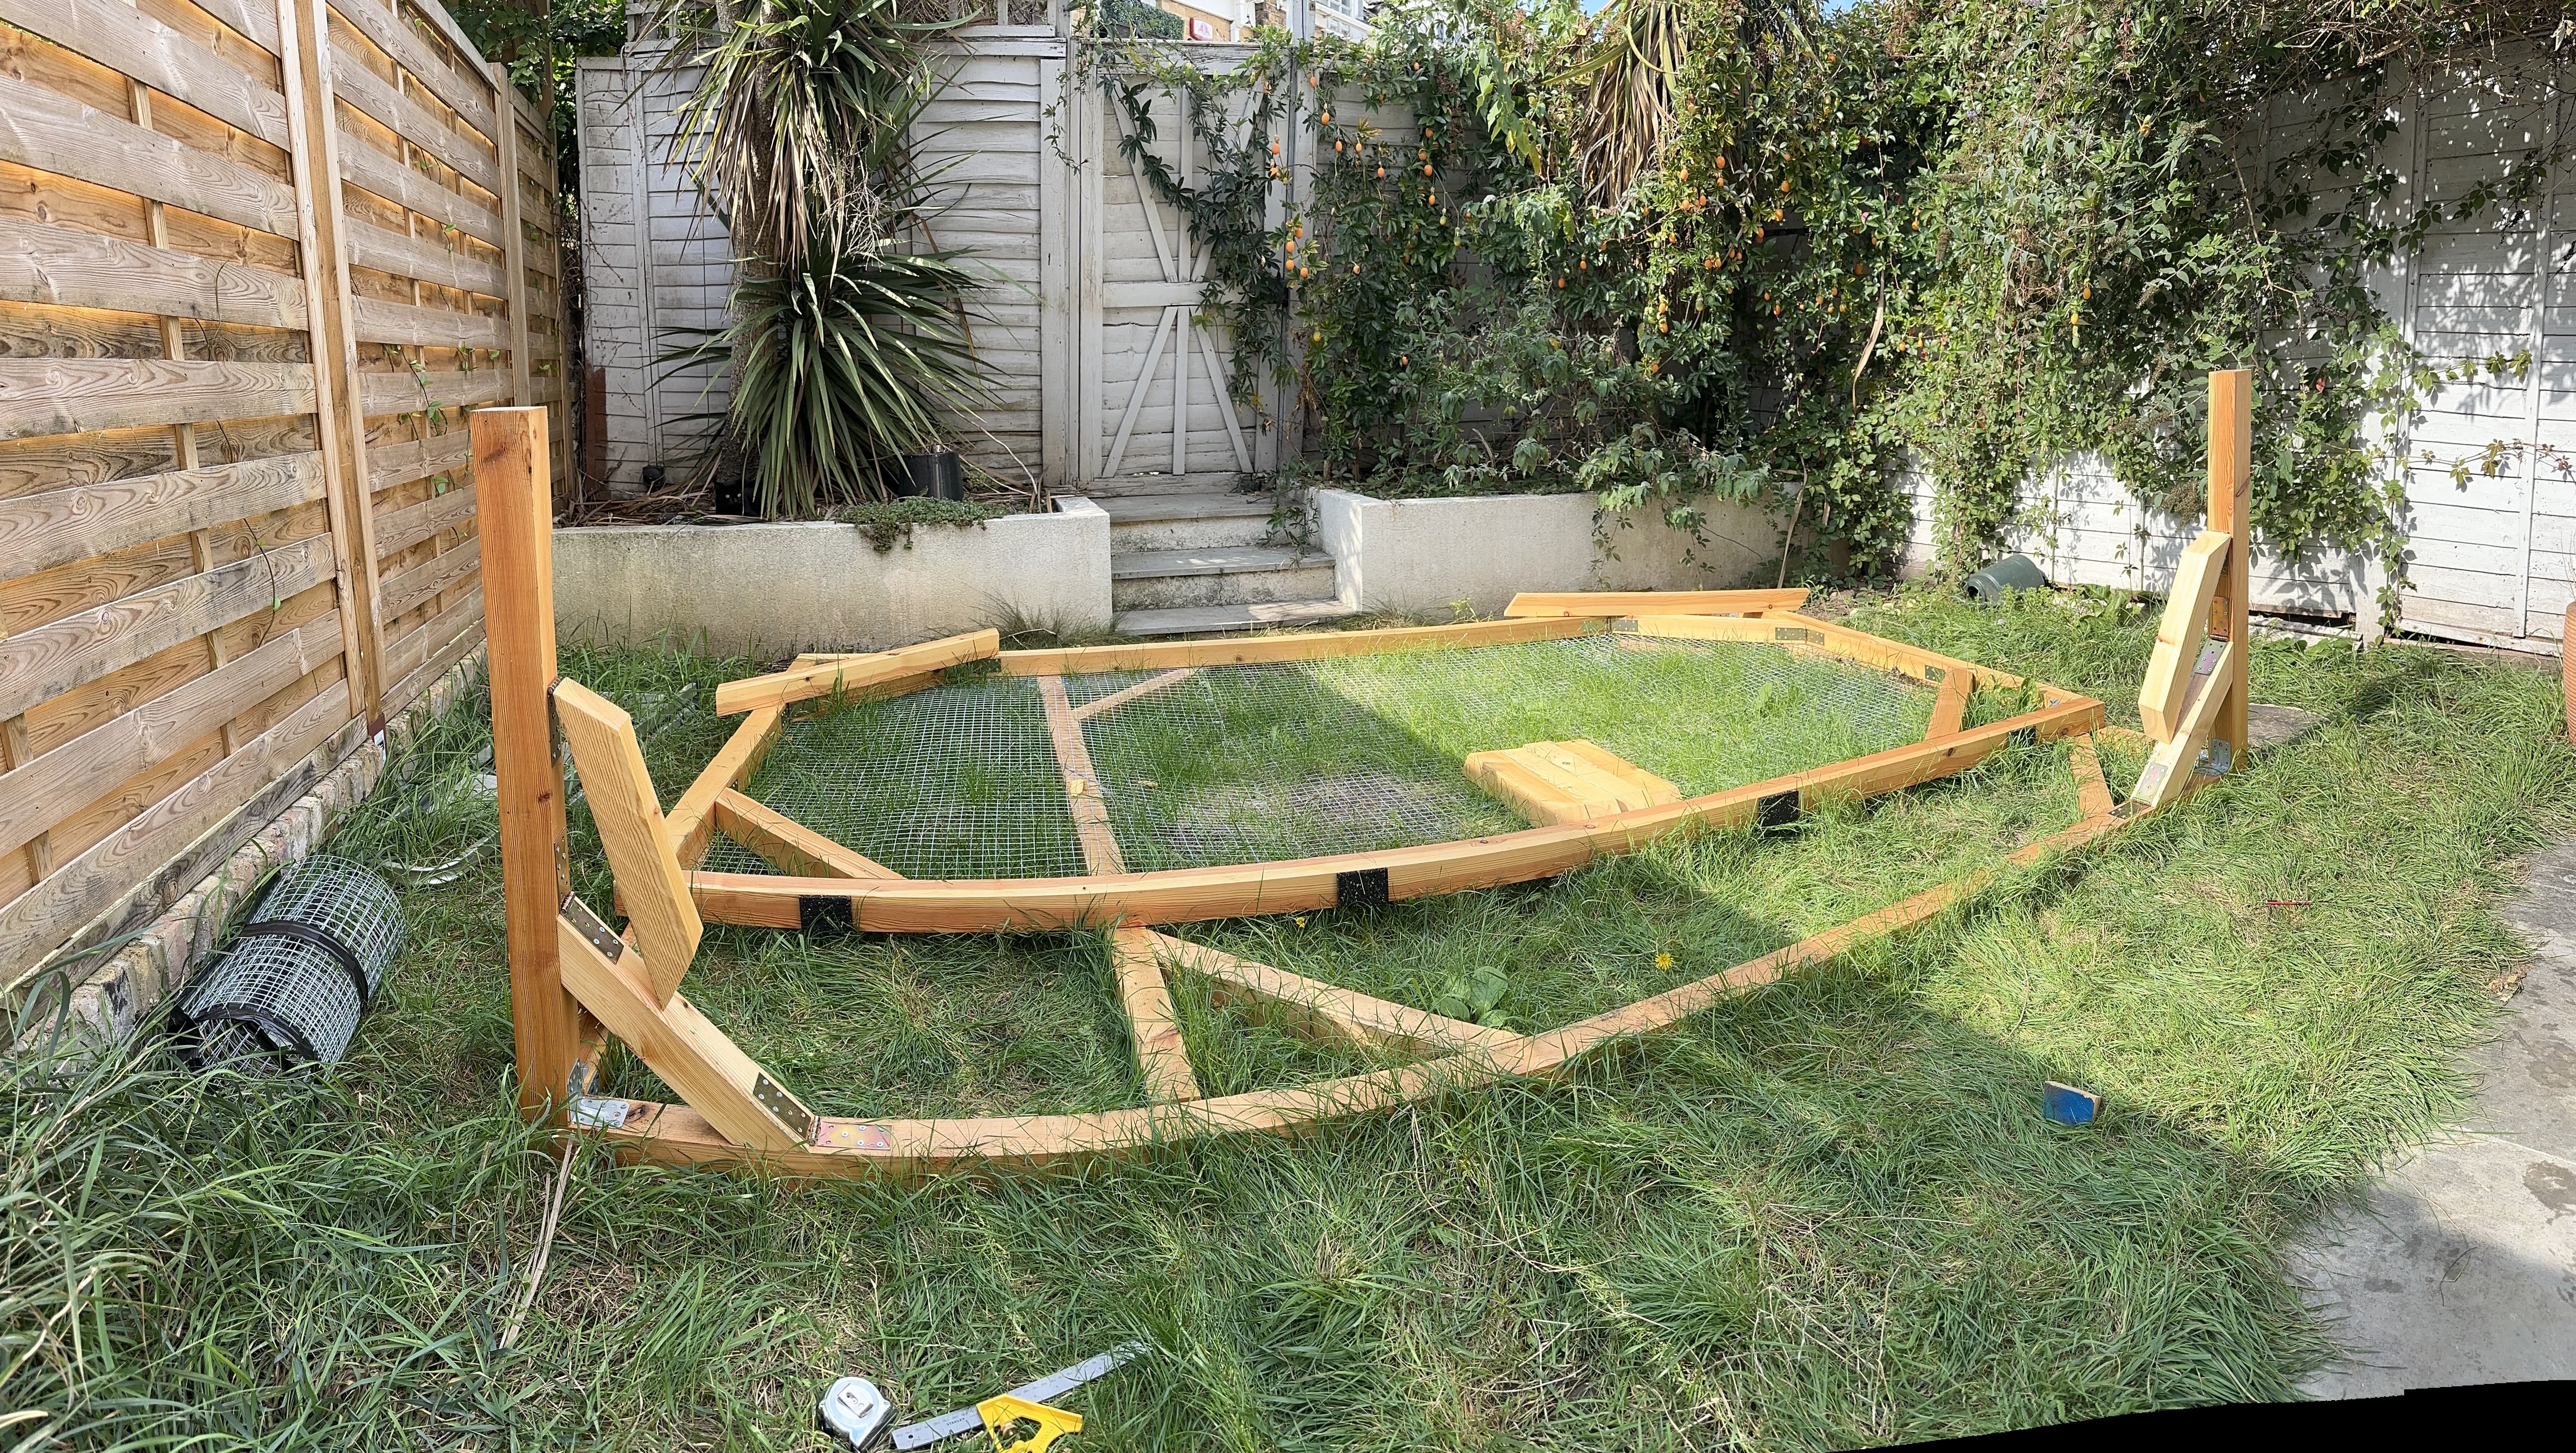
Around this time we also started to get worried about the fact that we hadn’t
really planned all the way through how we would assemble the walls, and we
were discovering that the fact that the patio area is far from rectangular was
actually going to be a problem. Katherine’s dad came over to help us do some
exciting trigonometry and decide whether to make the final foundation
rectangular or some crazy shape.
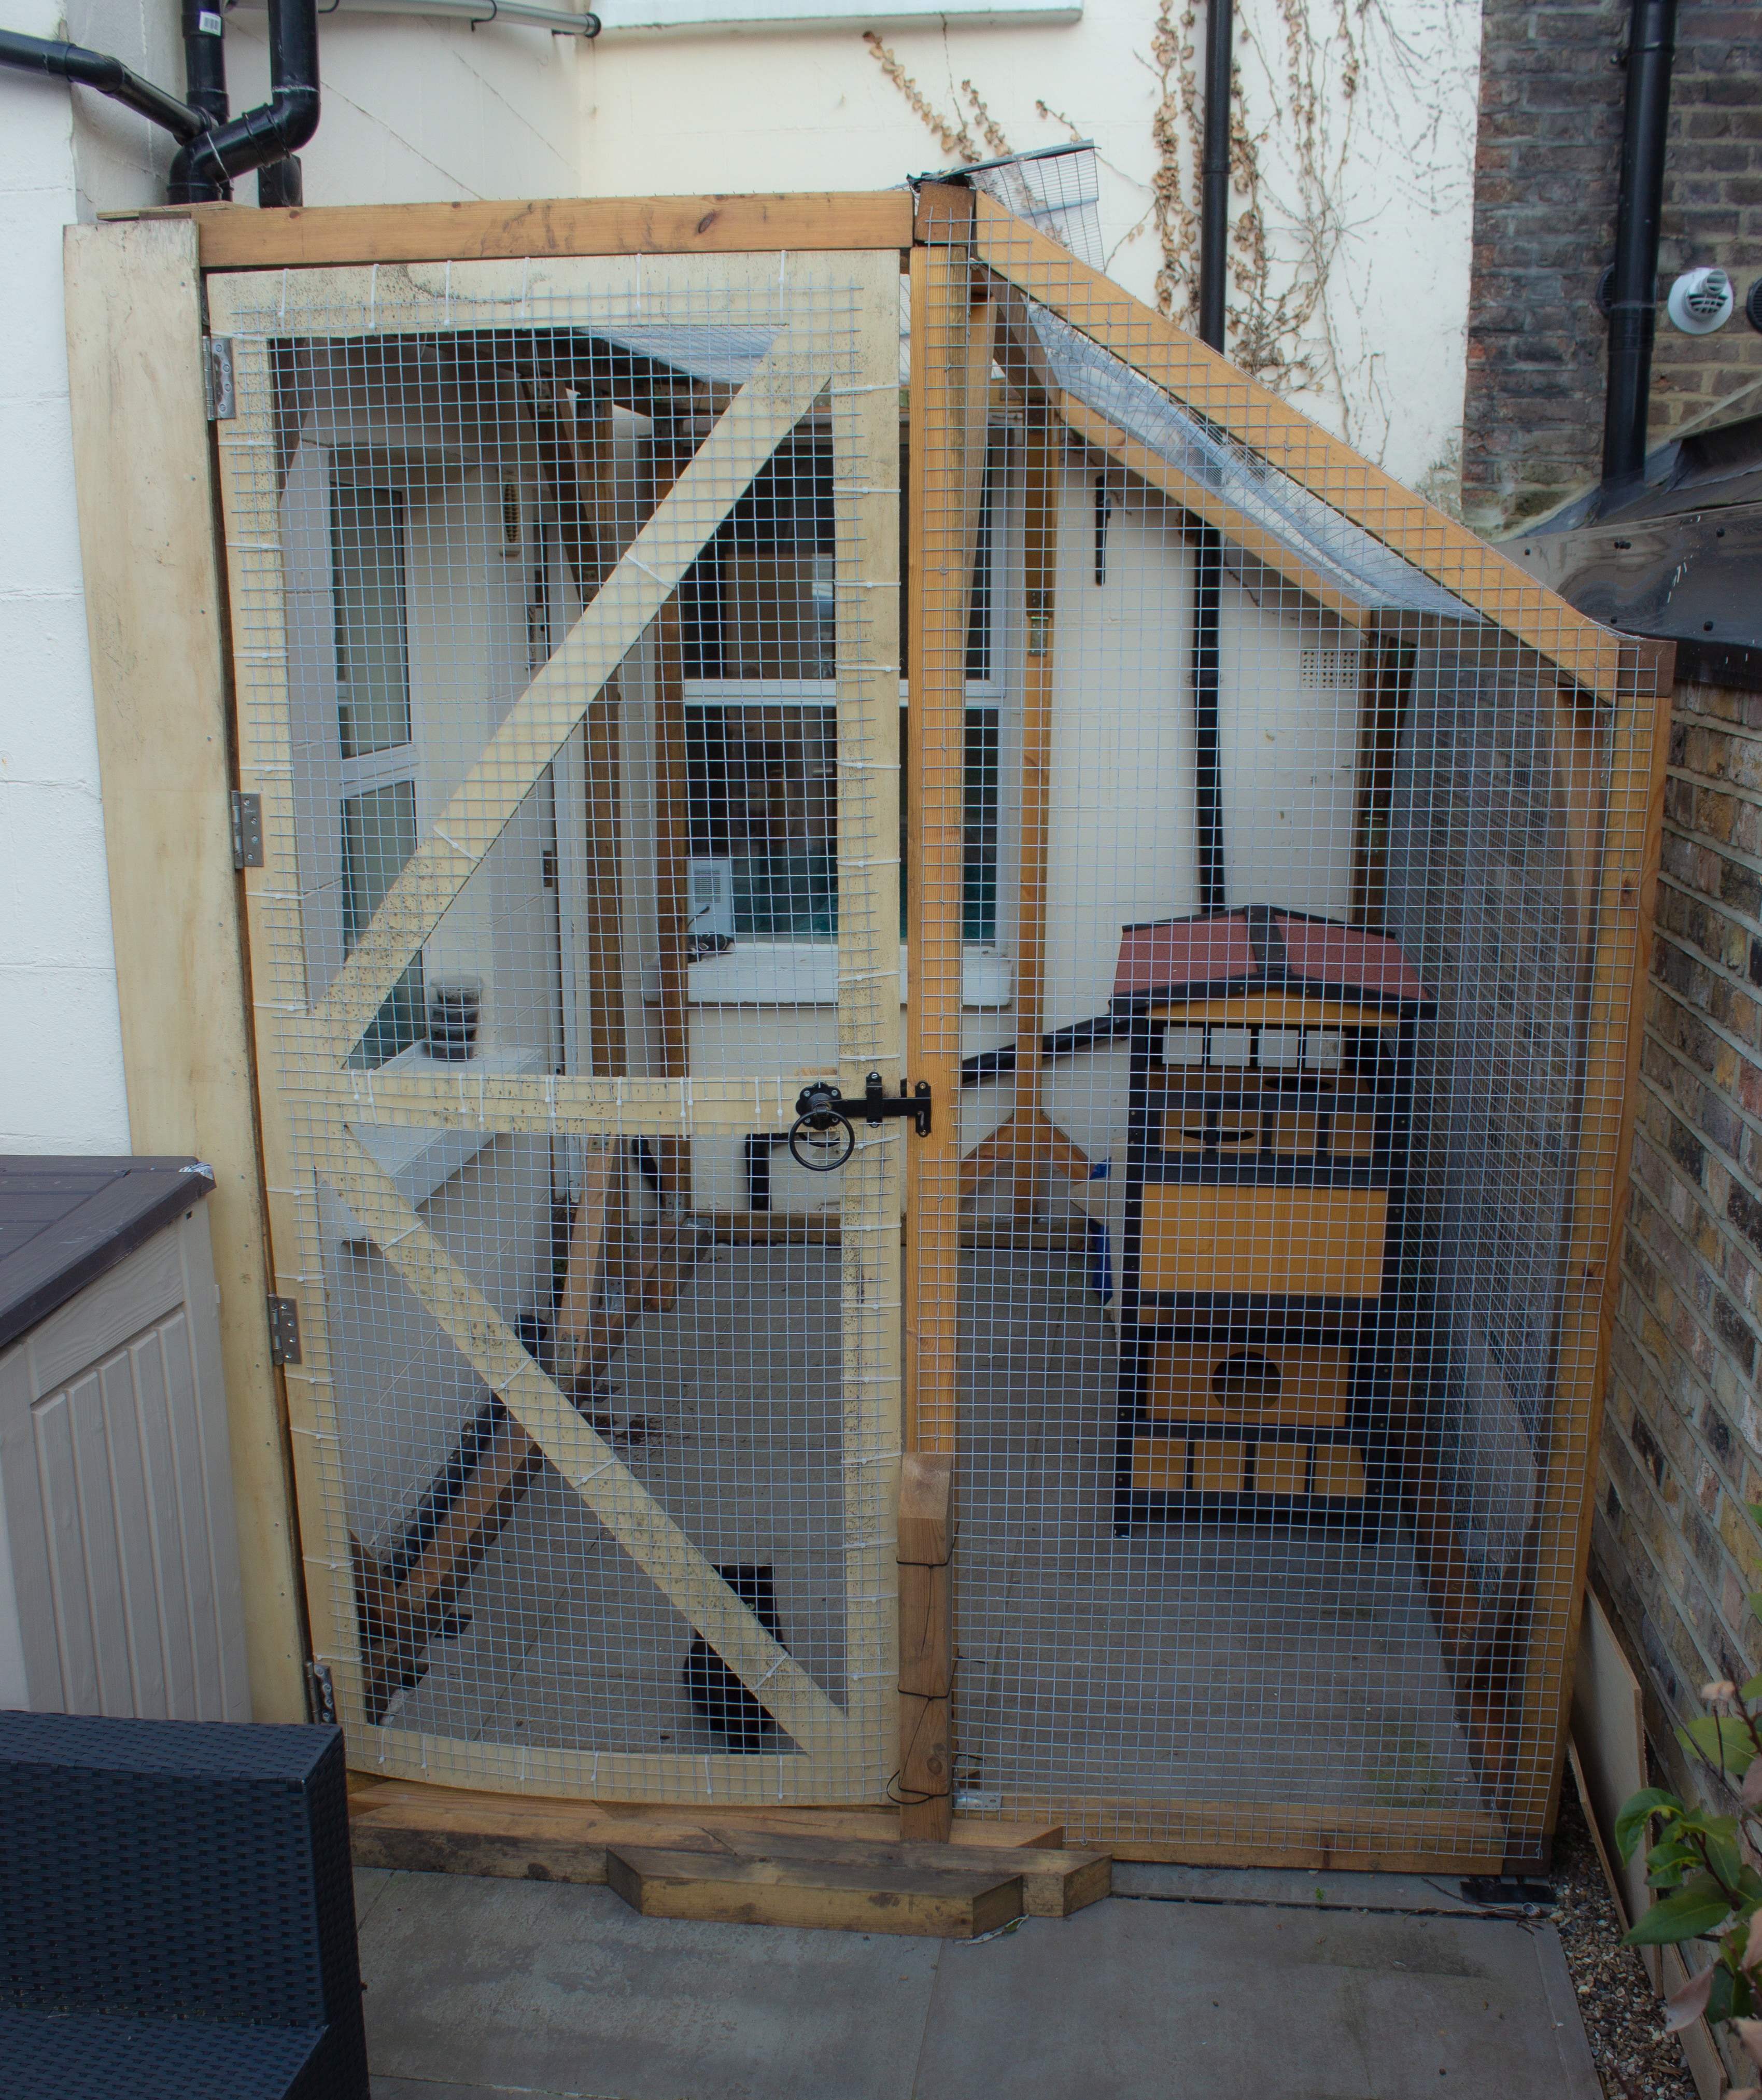
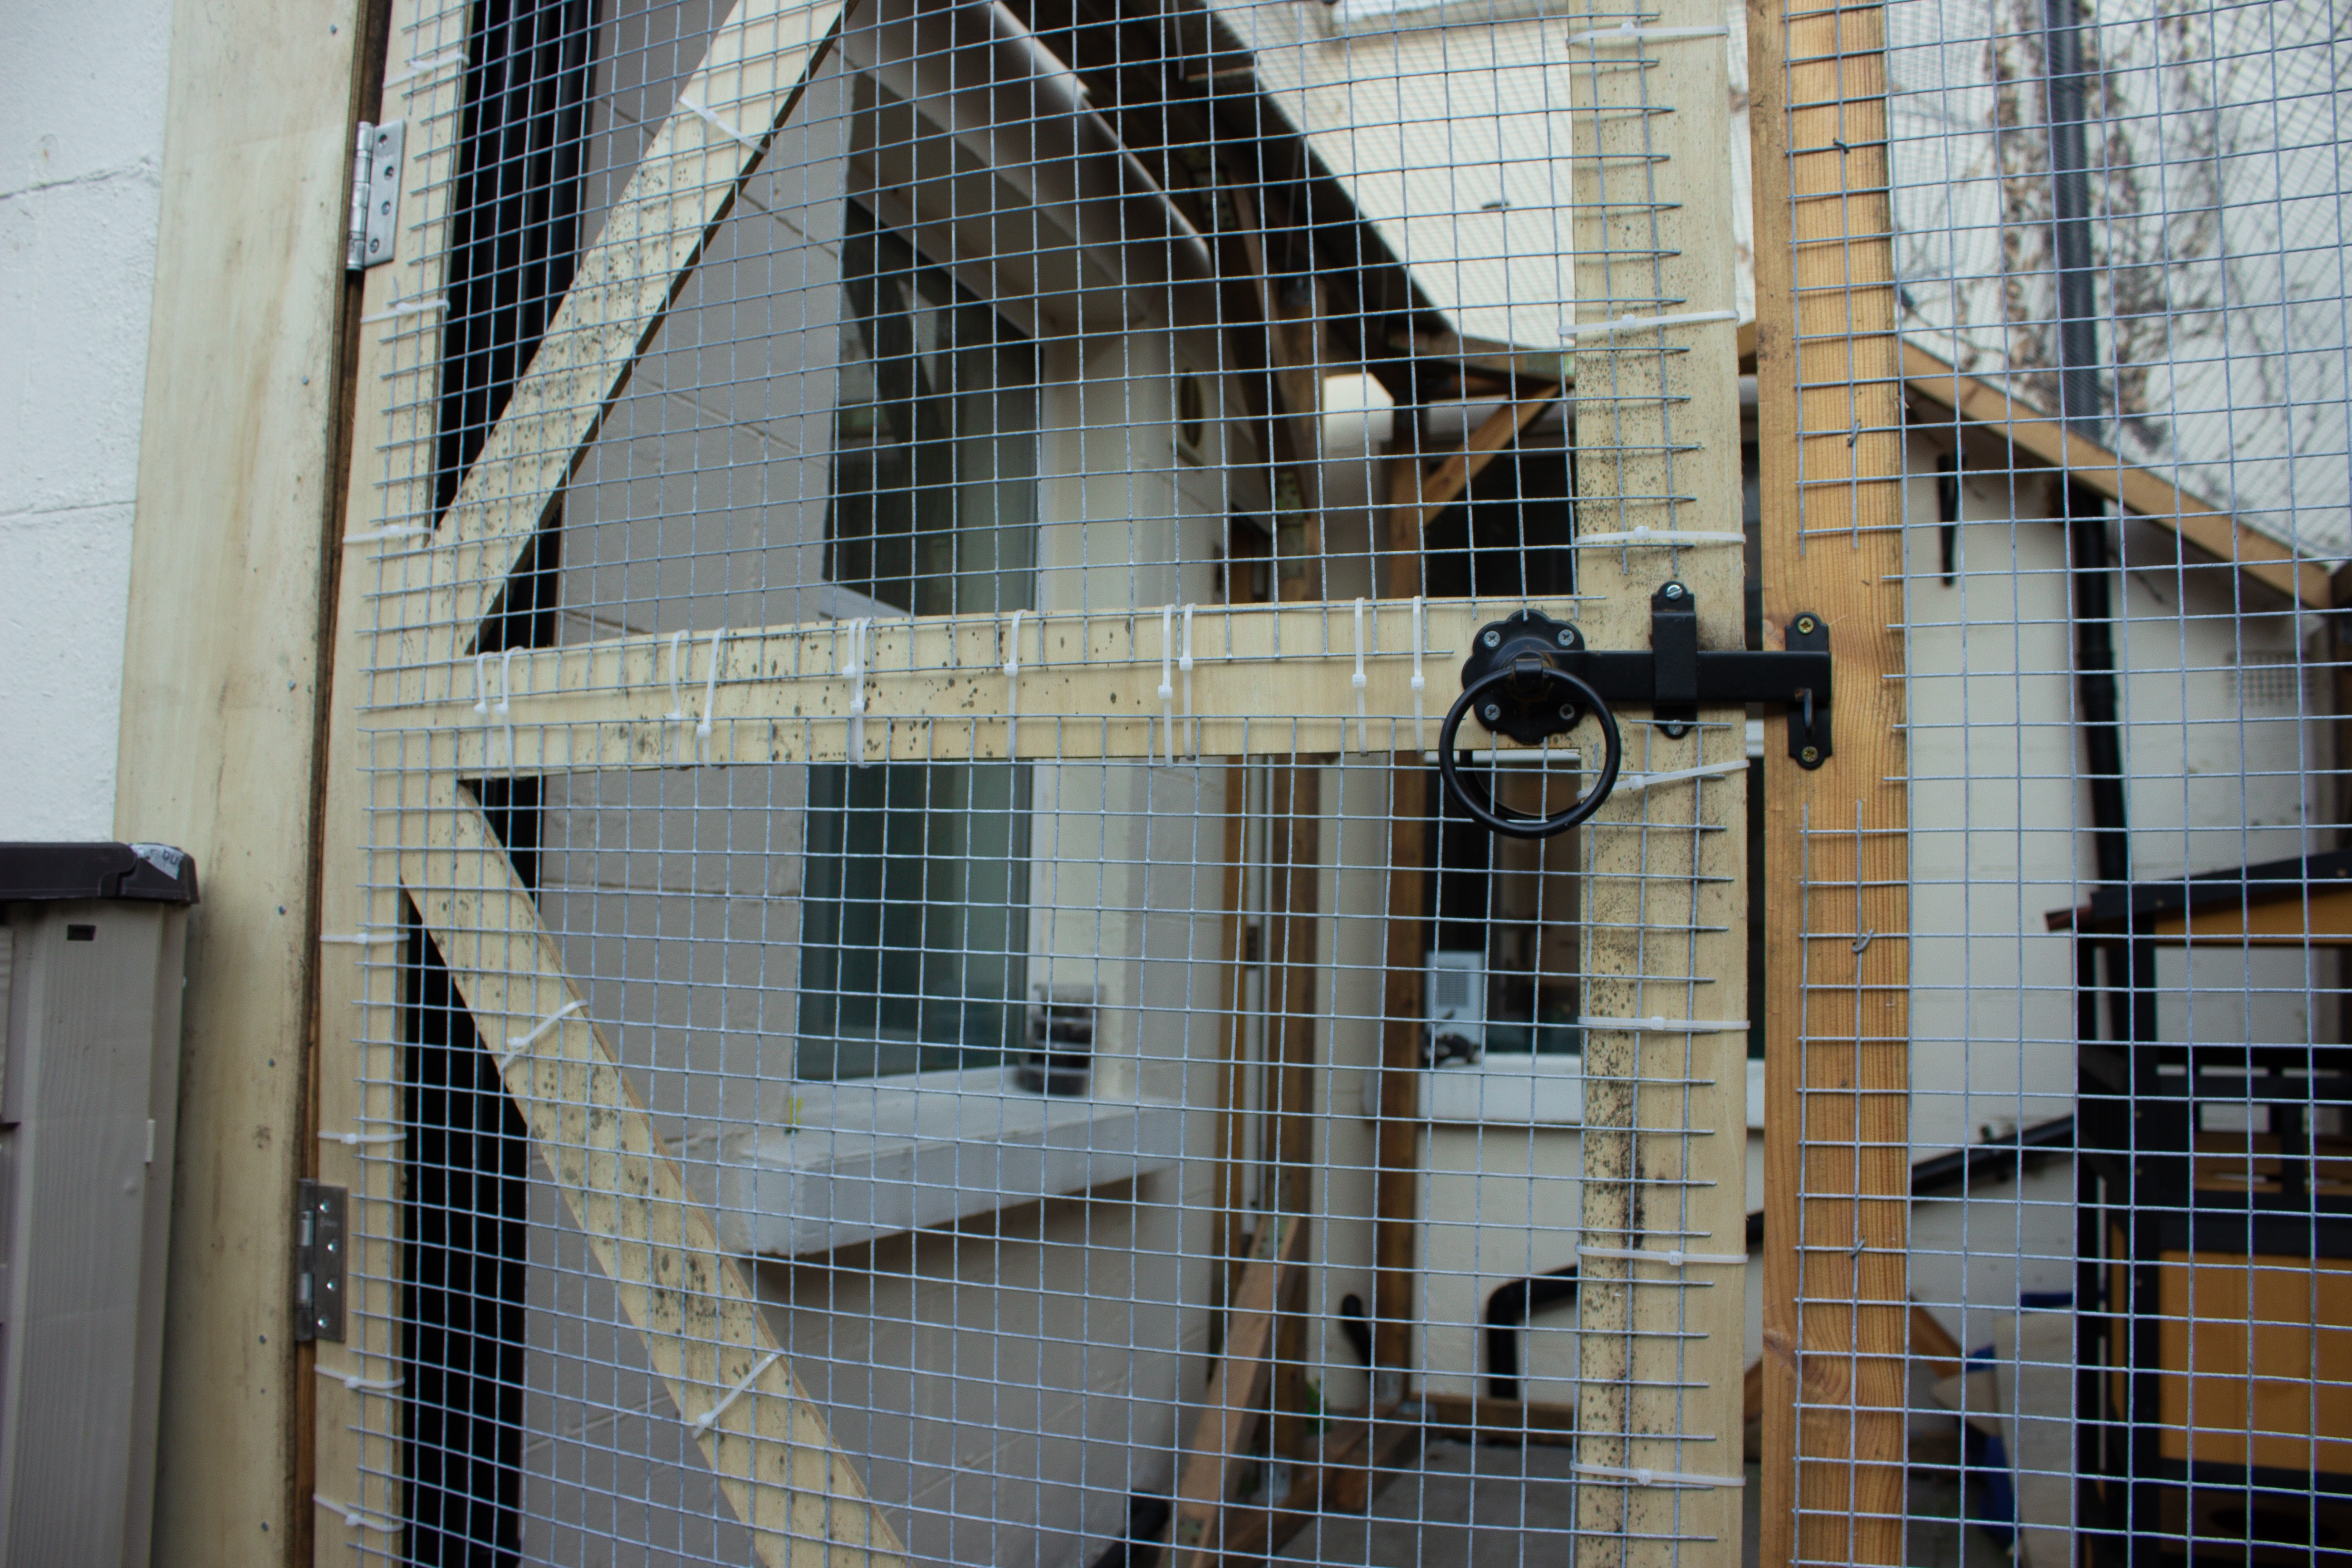
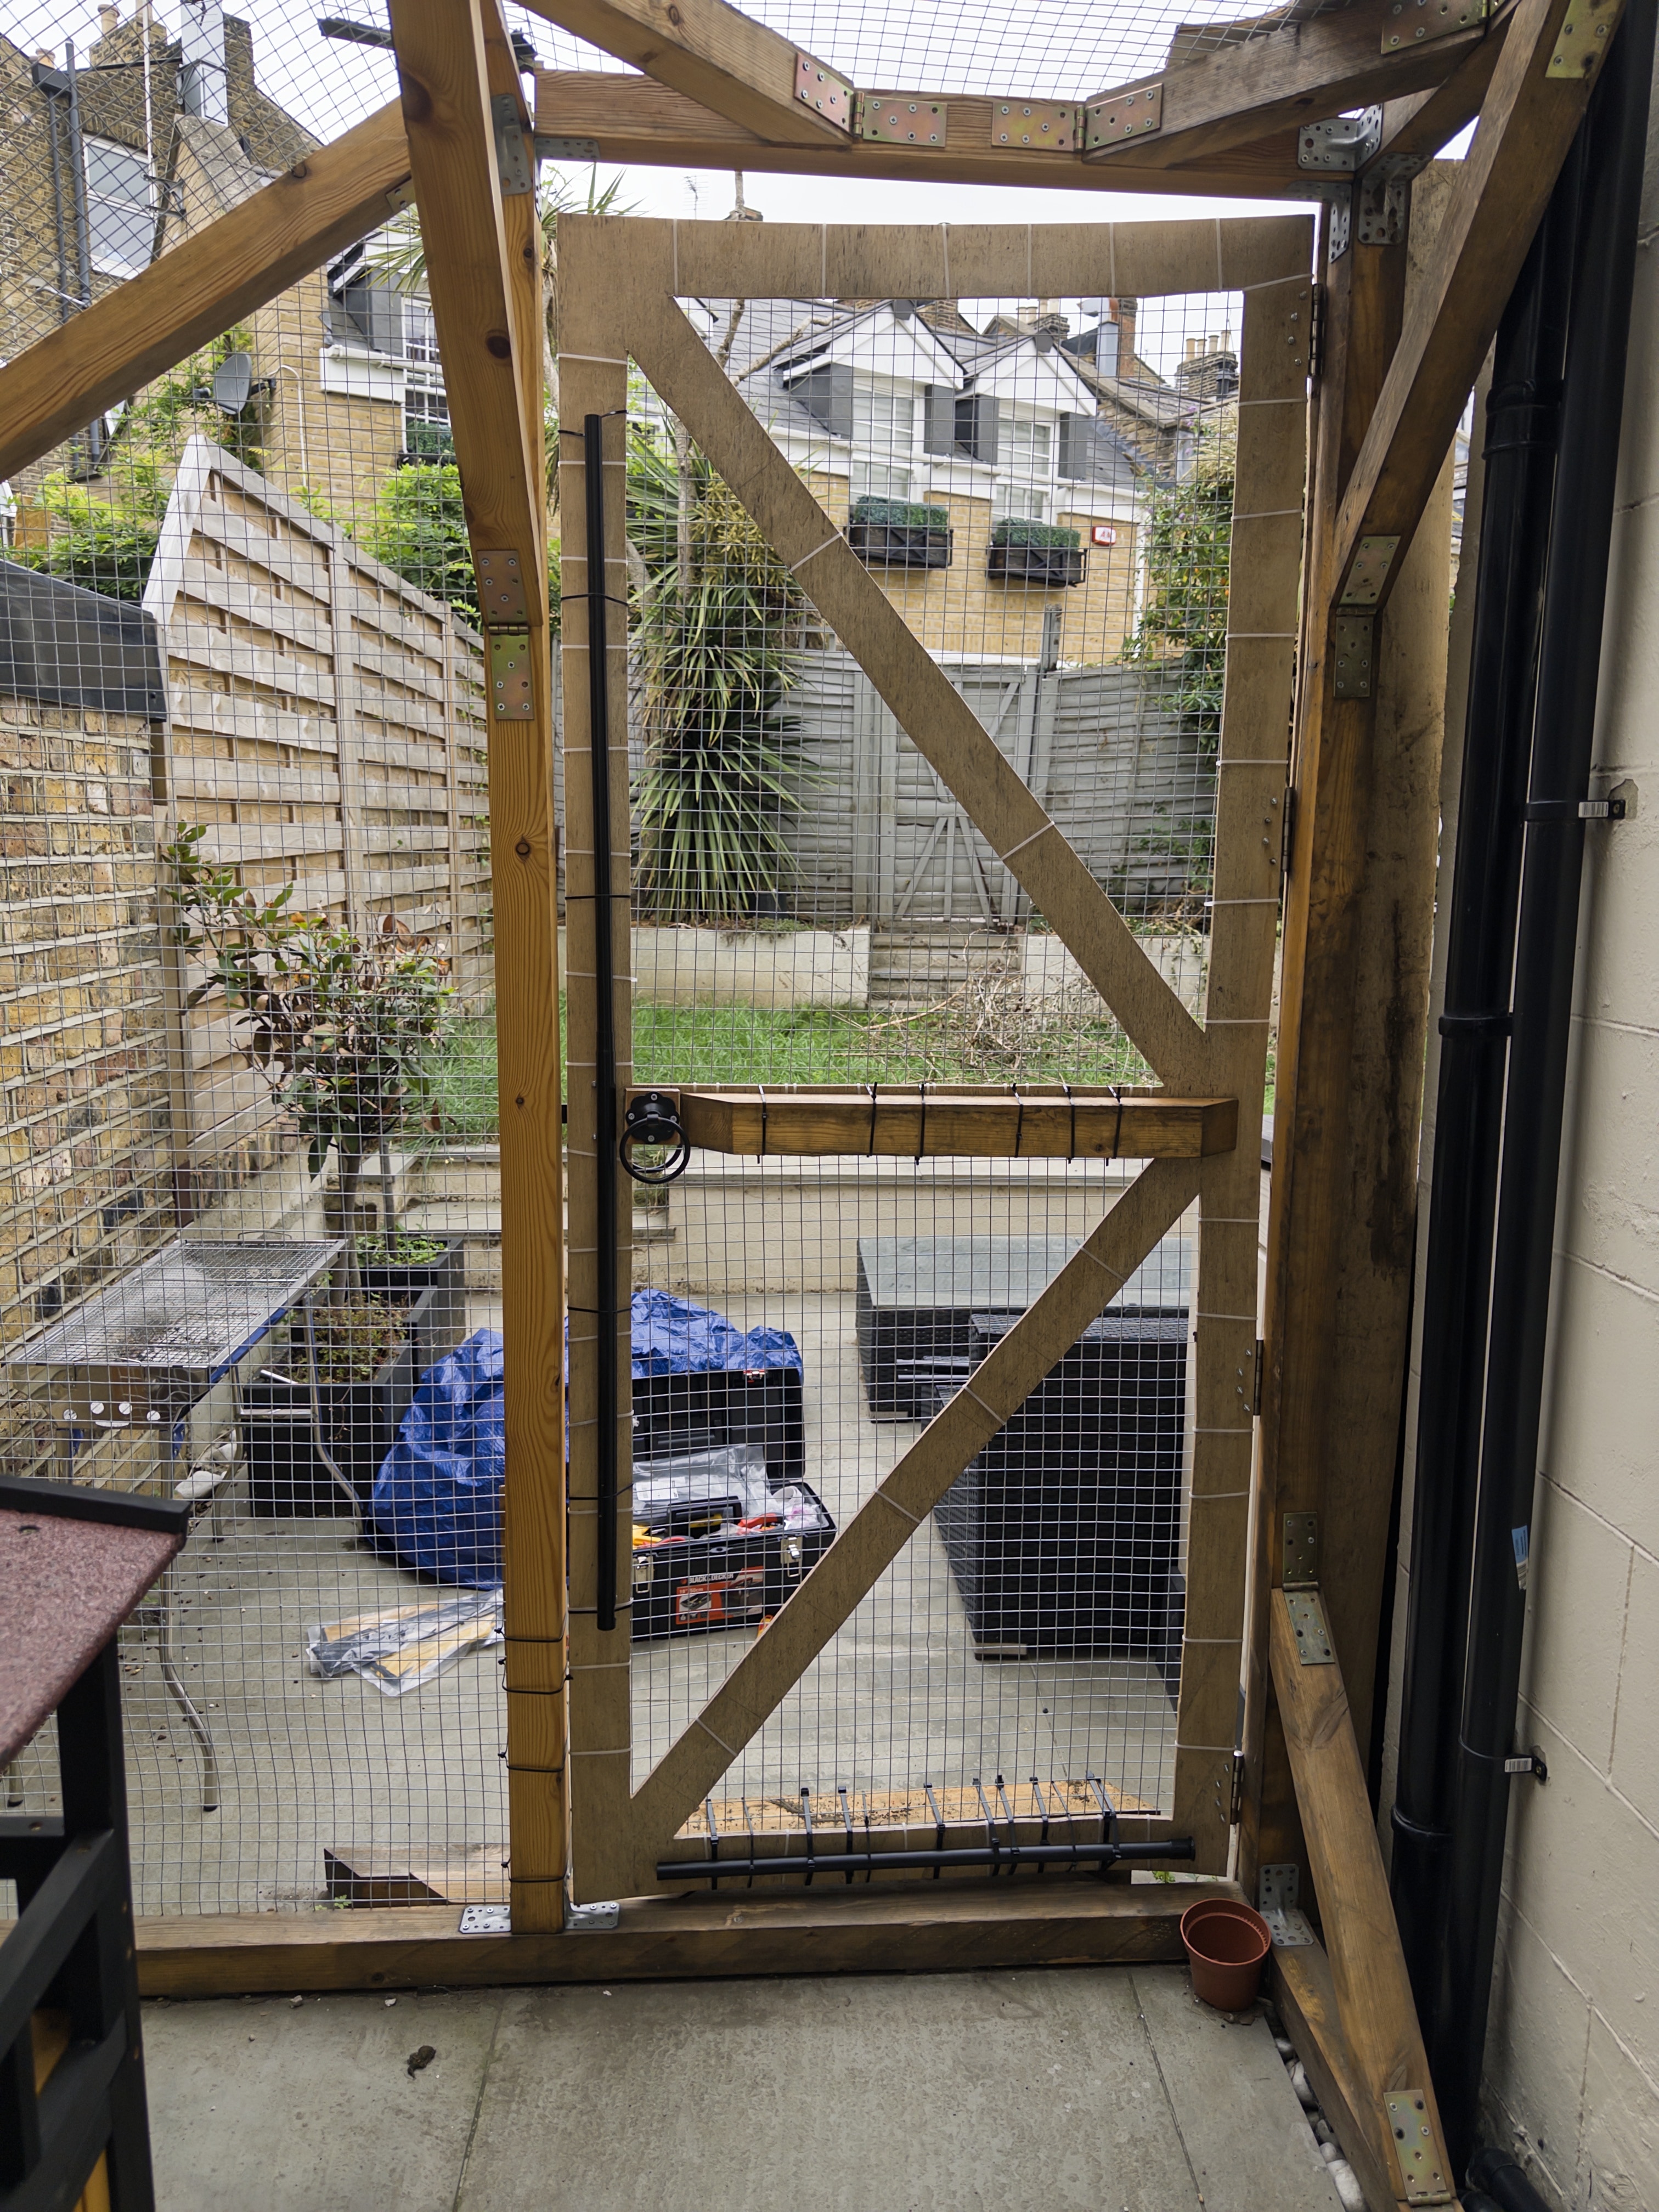
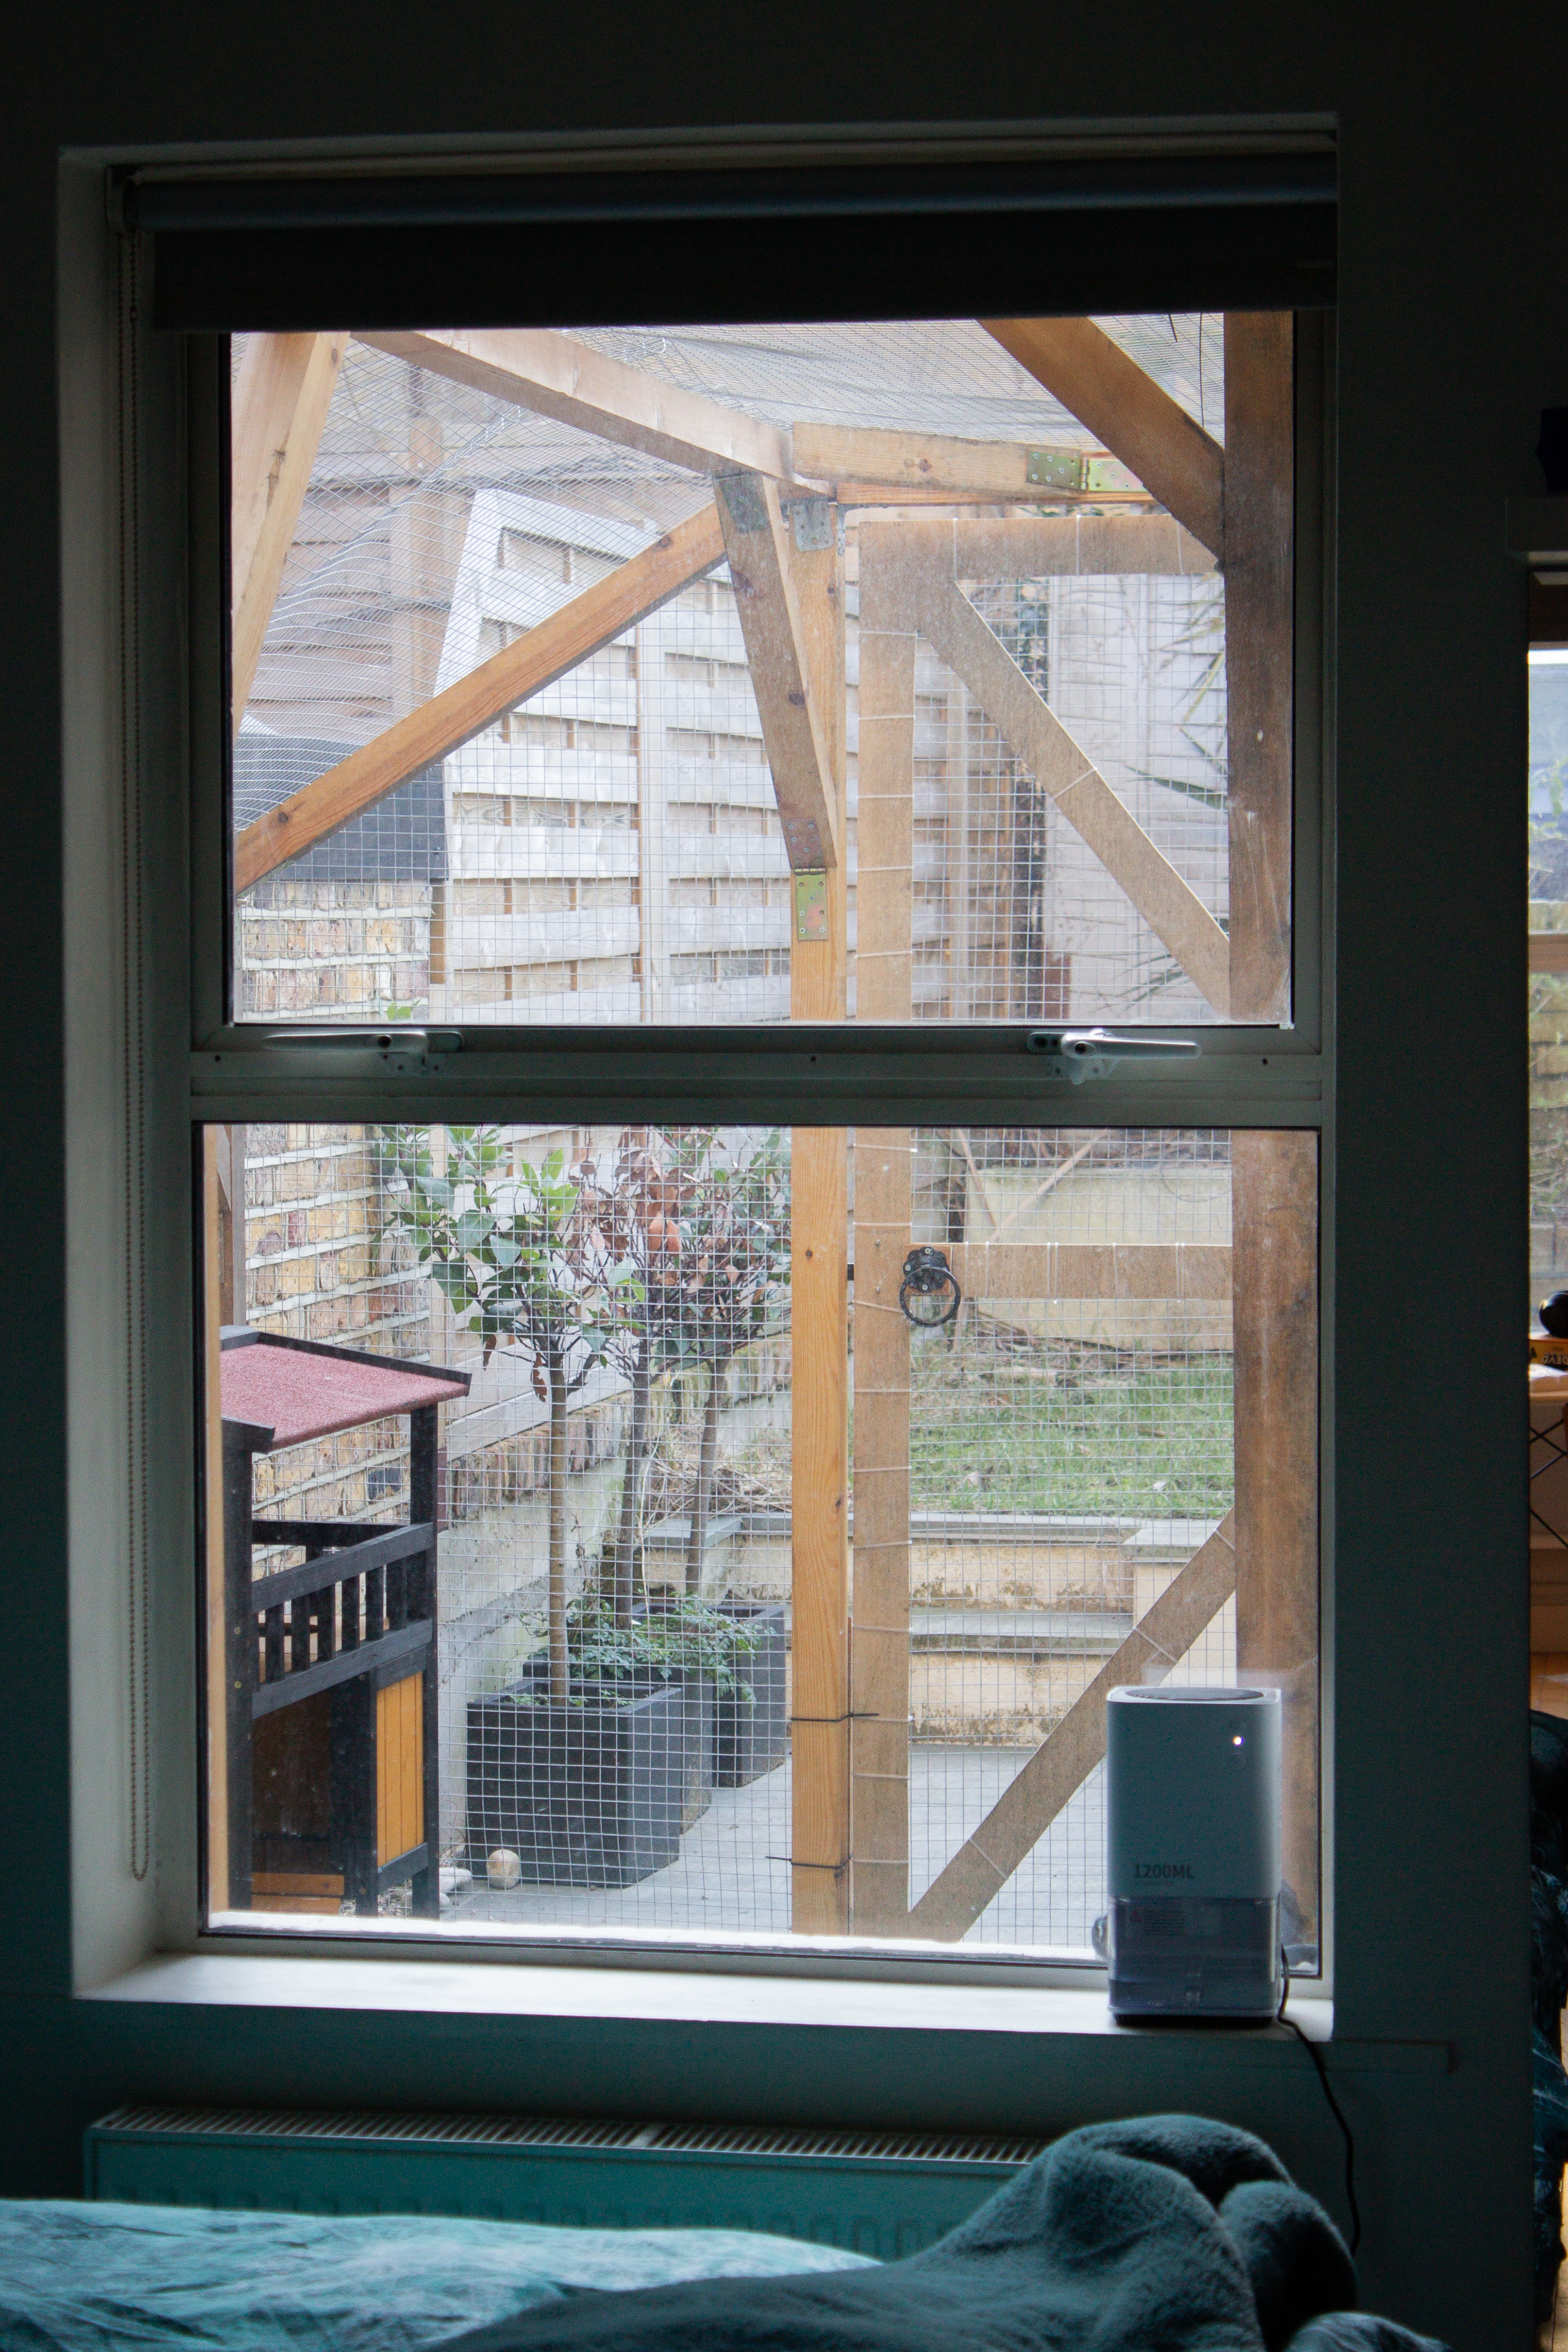
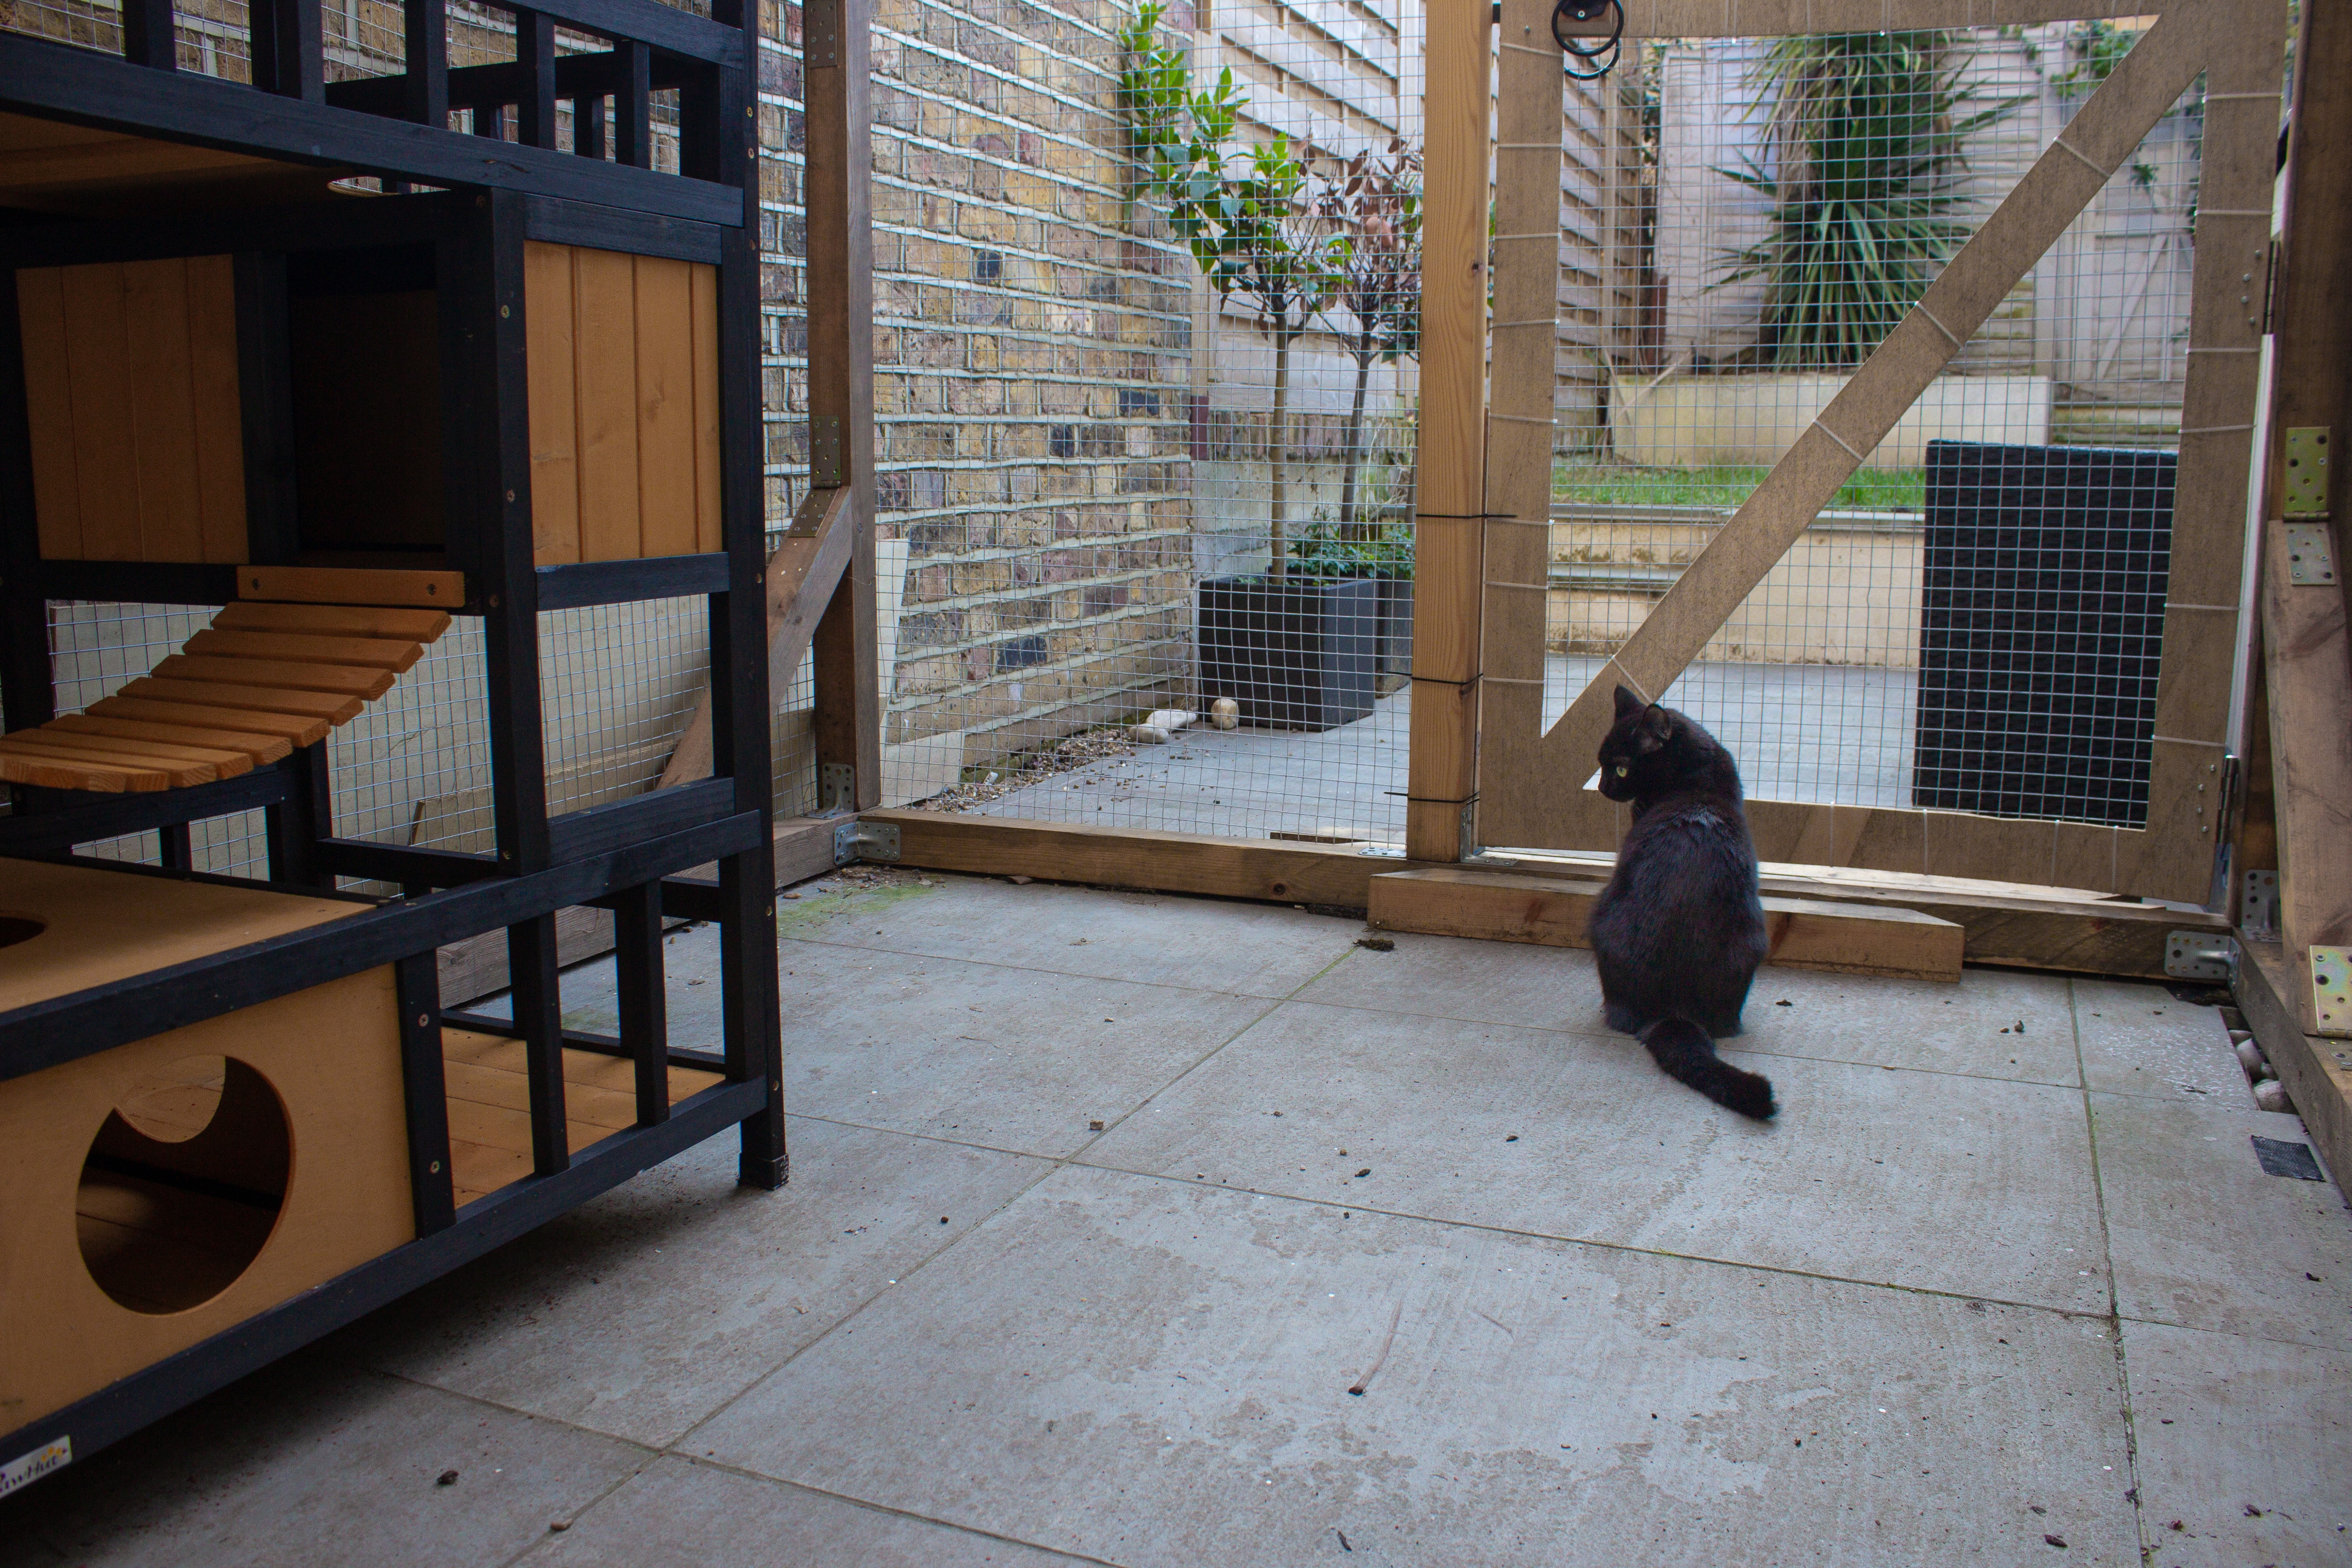
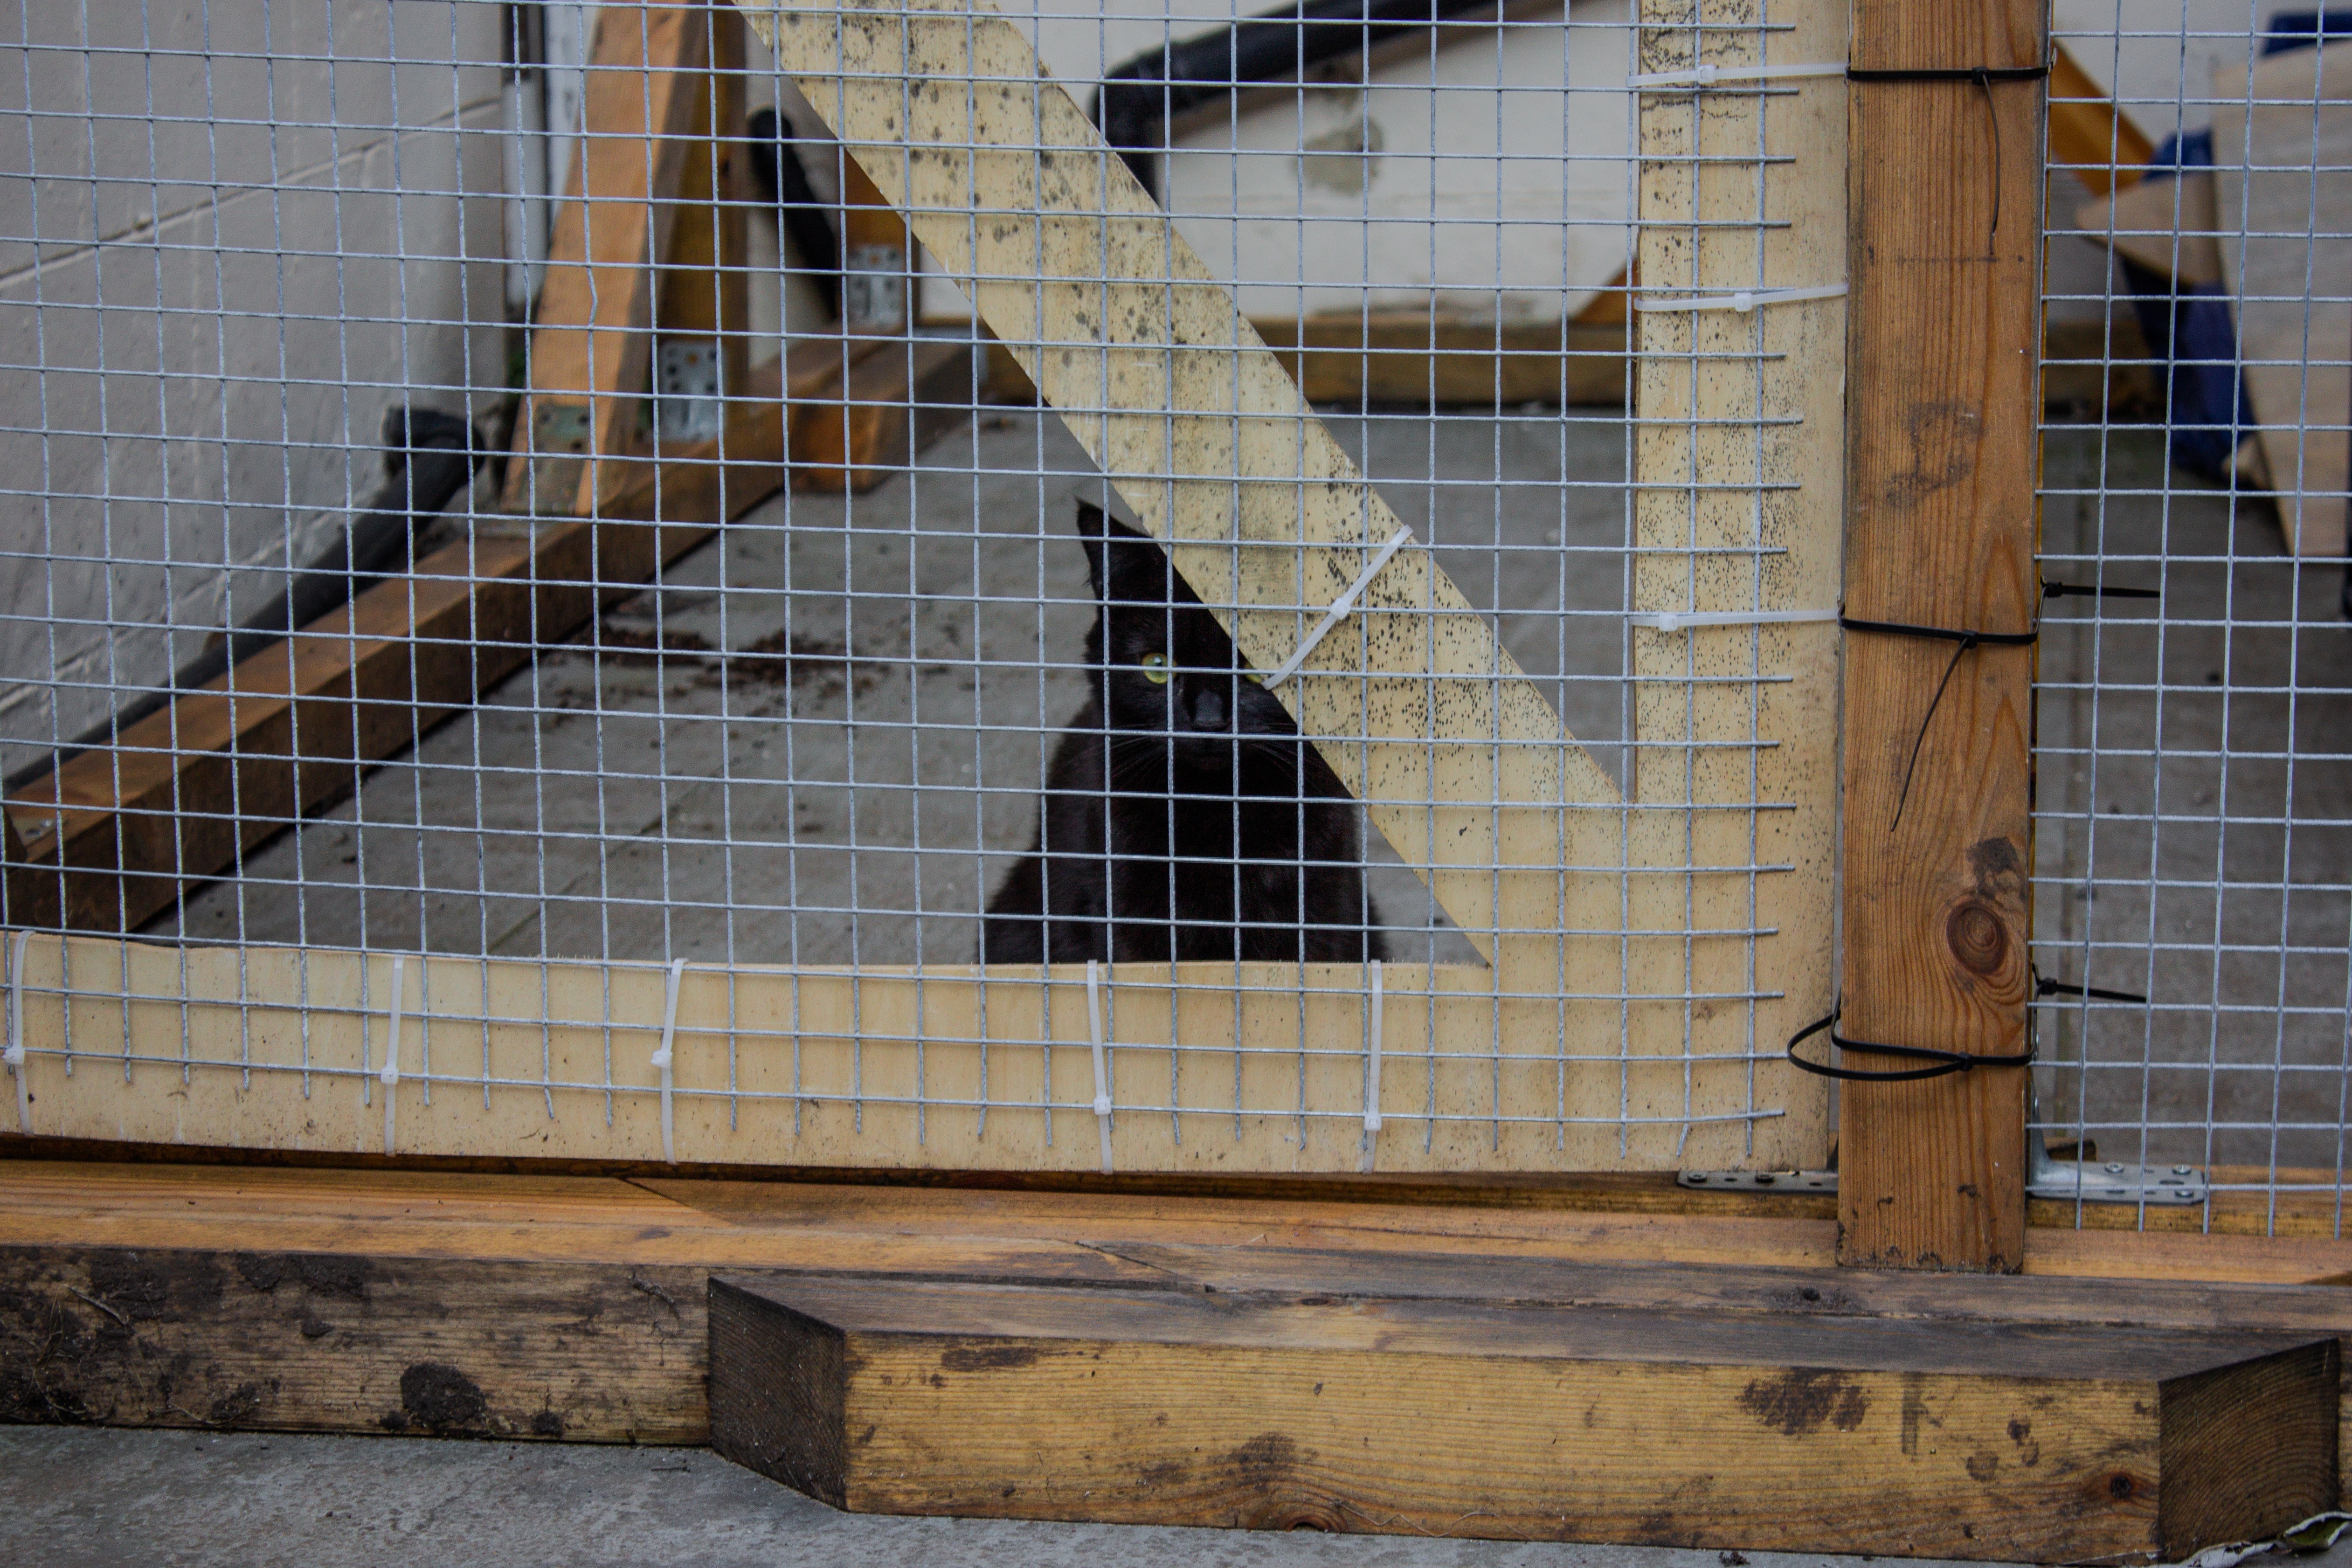
In the end, we decided to make the frame rectangular, to make it easier for us
to connect all the corners. Here’s the finished catio, with Jinx inside looking
forlorn. (In the meantime, he even got that nice house within a house!)
The door is made of a big plane of thin wood, with sections cut out, and mesh
zip-tied over it. I was most worried that the hinges or locking mechanism would
be a problem, but they worked a charm. The real challenge with the door is that
it’s bending quite a bit.
You can already see it in the picture above, but over the months it’s gotten a
lot more severe. Without any better solution in hand, we’ve added some metal
pipes to straighten the door. Maybe that will help:
I was recently working on a little web-based audio recorder tool. To abstract
away all the code dealing with the MediaRecorder API, I made a React hook that
you could use like this:
The hook would set up a MediaRecorder instance
and startRecording and stopRecording would call start and
stop.
Calling start(timeslice) will cause a dataavailable event to be triggered every timeslice milliseconds. I then had
an event listener that adds the new data Blob to an array in a useRef.
So far, everything was pretty straight-forward. Next, I wanted getAudioData to
give me all the audio recorded thus far, but MediaRecorder doesn’t have a
method for that. The easy solution would be to return whatever data is
currently stored in the audio chunks ref and set the timeslice value to
something low, like 100ms. Then, when you call getAudioData, the data you get
is at most 100ms out of date. But this also means you have an event handler
pointlessly firing every 100ms.
Fortunately, there is a method called requestData, but all it
does is queue up another dataavailable event. It does not, itself, return the
requested data, or tell you when the dataavailable event has been handled.
The solution
So I wanted a way to call requestData on my MediaRecorder and await until
my event handler fired and updated the audio chunks ref with the latest data.
The solution I picked was to create a new Promise, “steal” its resolve
function from the callback passed into the constructor, and store it in a
useRef. As long as the ref is in scope for the event handler, the event
handler can now resolve our promise.
This is what it looks like when you put it all in its own hook:
You can use this hook for all sorts of things, like awaiting an onclick event on a button.
This same general technique also works to get an async function* from an event listener (which, idk, might be useful for some reason).
Now that going bouldering once a week no longer counts as having a personality,
maybe I should try to stand out by being that guy who says “ECMAScript” instead
of “JavaScript”.
Anyway, here are some new(-ish) JavaScript features that I recently discovered.
groupBy (2024)
There are now built-in functions to group array elements. With
Object.groupBy(items) the result will be a normal object, and
with Map.groupBy(items) the result will be a Map.
Both of these have been widely available since March 2024, so they’re ready to
use.
Iterator helpers (2025)
I’ve always been irrationally upset that JavaScript’s iterators aren’t as
ergonomic as Rust’s. In Rust, you write something like
and that turns your original things into a lazy iterator, then does a bunch of
operations, and then collect() turns it back into a Vec. The iterators
just go through the items one by one instead of allocating a whole pointless
intermediate array.
If you do the same thing in JavaScript, it looks like
things
  .map((thing) => do_stuff(thing))
  .filter((thing) => do_stuff2(thing))
  .map((thing) => do_stuff3(thing));
Semantically that does the same thing as the Rust code, but each map and
filter allocates an intermediate array. If the initial things is large, this
could theoretically be a performance issue. So far, the way to optimise the
above code would be to just use for loops, but for loops are cringe, so the
fine folks at TC39 have blessed us with the same helper methods found on
Array, but for Iterators. So you can write
and bask in the glory of some beautiful premature optimisation.
These methods are available in all modern browsers as of 2025, so are also ready
to use.
Error.isError (2025/2026?)
If you ever get annoyed at catch (error: unknown) in TypeScript, there is now
a reliable way of checking whether something is an error, and that is
Error.isError(error). It’s more readable than
and it’s more reliable than error instanceof Error, because the instanceof
check apparently fails when the error was constructed in a different
realm.
Error.isError is available in all modern browsers, except that Safari will
currently return false for DOMException objects, which it shouldn’t. So this
one is almost ready to use.
TypedArray.prototype.subarray
This one’s actually been around for 10 years, but I only discovered it recently
(partly because I’ve never really used TypedArrays before). Unlike
TypedArray.prototype.slice, TypedArray.prototype.subarray
creates a new TypedArray that points to the same block of memory used by the
original, and the data isn’t copied. I found this useful when I was writing
(part of) a disassembler, which looked kind of like this:
function decode_instruction(data: Uint8Array): [Instruction, Uint8Array] { // Some horrifying ungodly logic return [ my_instruction, data.subarray(however_many_bytes_my_instruction_has_taken_up), ];}function* decode_instructions(data: Uint8Array): Generator<Instruction> { let rest = data; while (rest.length > 0) { const [instruction, new_rest] = decode_instruction(rest); yield instruction; rest = new_rest; }}
With TypedArray.prototype.slice, this would have allocated a whole new copy of
the input data after each instruction was decoded. Without subarray, I’d have
had to just keep a reference to the original array and pass around an offset
index, and that would have been so inconvenient.